Are you playing Stardew Valley on PC, Mobile, or Switch? If you’re looking for a new gameplay approach and want less work, here are 19 fun things to try!
Step away from many mechanically, physically, and sometimes mentally-demanding competitive games. It keeps you from losing focus and enjoying the game because of the toxicity and saltiness of your teammates. Aren’t video games meant for relief and comfort if you’re under stress?
Stardew Valley is the best option among many others in the same genre. It’s a masterpiece by a lone developer, ConcernedApe, who spent years perfecting it. For its gameplay, you take the role of a former JojaCo. employee who entered Pelican Town for farming.
A combination of the addictive soundtrack, soothing visuals, and beginner-friendly gameplay is what makes Stardew Valley awesome! You check here and there to see what will work, and you’ll become a veteran. Of course, it comes with pouring down hundreds of hours in total commitment.
However, at some point, you’ll know everything about the Community Center and finish all the bundles. What’s left to do afterward? Even if you’re preparing for the most legitimate way of beating the game, you need to relax again.
This list will provide 19 fun things to do in Stardew Valley. No pressure, zero competitiveness, just pure enjoyment is what you can expect.
1. Help the Villagers
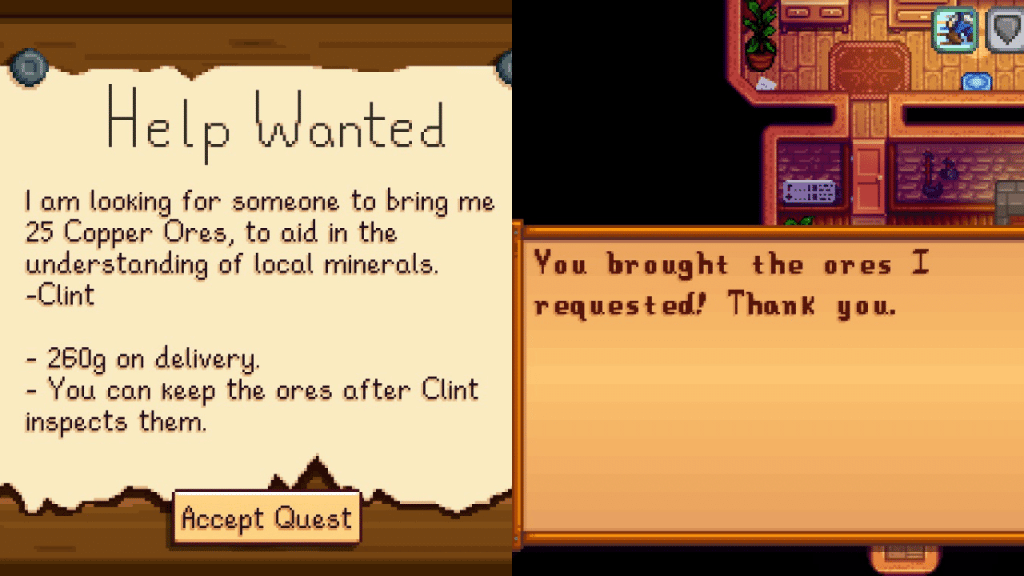
When we say no pressure, we mean it. Although you might feel some hurdles while meeting and greeting townspeople in the small town, consider it an adventure. Take things easy at the Help Wanted Board posted at the front of Pierre’s General Store.
Do you have some extra items? Can you do a particular task? If you’re more than capable, taking the opportunity is sensible. Not only will you get close to someone you helped, but you’ll also get compensation (albeit it varies).
The reward often comes with gold but is three times the selling price of the regular value. 150 Friendship Points is the most usual villager benefit depending on who made the request.
Next time you walk past Pierre’s Store and see a flashing “!” icon, interact with it to read the quest! It’s your choice to accept the side mission since you’ll need to commit two days to focus per task. Here are four types of Help Wanted quests that villagers may post:
- Fishing. Demetrius will ask you to catch one to five pieces of a specific fish type to reduce population. On the other hand, Willy reasons to maintain the art of fishing kicking. Although the pay has no multiplier from a fish’s base price, you get to keep them.
- Gathering. If you love trekking below the ground, consider taking Clint’s request to collect Copper, Iron, or Gold Ores. The usual quantity starts from 20 to 40. Meanwhile, Robin will ask for Wood or Stone with the same pieces as Clint’s.
- Item Delivery. Delivering items is the most common Help Wanted quest and easiest if you have the material beforehand. This mission type is where the regular value triples, plus you’ll get 150 Friendship Points for the requester.
- Slay Monsters. Reducing the monster count in the Local Mines is for Stardew Valley’s protection. It’s true despite hostile creatures not spawning in the Town (except for placing a Slime Incubator and hatching a friendly slime that is not harmful). You can get the quest from Clint, Demetrius, Lewis, or Wizard.
2. Befriend Everyone
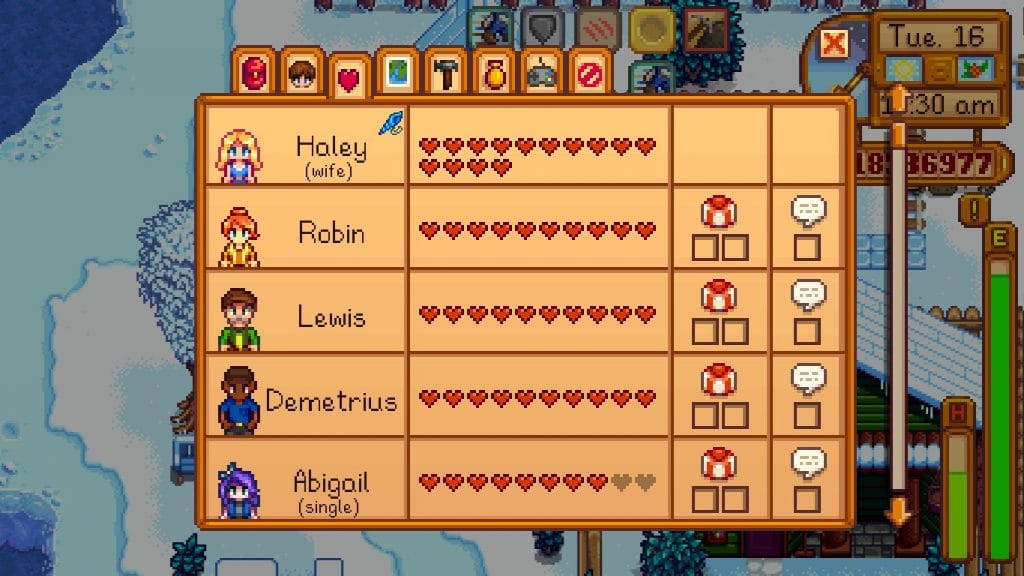
Admit it, you’ve met Haley picking on your good old farm clothes, and it’s the time to hate her. You may even relate to Penny’s slightly unfortunate position as the only child who does everything. But who could forget Shane’s uncontrollable episodes of wanting to end his suffering?
Everyone in Pelican Town has stories to reveal – be they harmlessly funny to the most controversial ones. In Stardew Valley, choices sometimes matter in the dialogue. You won’t want to answer selfish statements if you’re talking to Leah!
But aside from fascinating tales are several benefits you can have if you befriend everyone in town. Here are they:
- Gifts and Recipes
Having your post box with tons of friendly mails is a delightful feeling. You’ll feel special despite it being in Stardew Valley because you’re getting free stuff! While some presents are sometimes unsettling (Kent’s explosives, for example), it’s worth something.
Are you developing a cooking interest lately? Raising friendship hearts with villagers is the way to unlock several recipes! The only downside is you’ll have to give them random items at first, and the clue depends on their personality and hobbies. But no worries, we’ll spill only the greatest and most ideal gifts for everyone:
| Villager | Best Items to Give |
| Abigail | Amethyst, Banana Pudding, Blackberry Cobbler, Chocolate Cake, Pufferfish, Pumpkin, and Spicy Eel |
| Alex | Complete Breakfast and Salmon Dinner |
| Caroline | Fish Taco, Green Tea, Summer Spangle, and Tropical Curry |
| Clint | Amethyst, Aquamarine, Artichoke Dip, Emerald, Fiddlehead Risotto, Gold Bar, Iridium Bar, Jade, Omni Geode, Ruby, and Topaz |
| Demetrius | Bean Hotpot, Ice Cream, Rice Pudding, and Strawberry |
| Dwarf | Amethyst, Aquamarine, Emerald, Jade, Lemon Stone, Omni Geode, Ruby, and Topaz |
| Elliott | Crab Cakes, Duck Feather, Lobster, Pomegranate, Squid Ink, and Tom Kha Soup |
| Emily | Amethyst, Aquamarine, Cloth, Emerald, Jade, Ruby, Survival Burger, Topaz, and Wool |
| Evelyn | Beet, Chocolate Cake, Diamond, Fair Rose, Stuffing, and Tulip |
| George | Fried Mushroom and Leek |
| Gus | Diamond, Escargot, Fish Taco, Orange, Tropical Curry |
| Haley | Coconut, Fruit Salad, Pink Cake, and Sunflower |
| Harvey | Coffee, Pickles, Super Meal, Truffle Oil, and Wine |
| Jas | Fairy Rose, Pink Cake, Plum Pudding |
| Jodi | Chocolate Cake, Crispy Bass, Diamond, Eggplant Parmesan, Fried Eel, Pancakes, Rhubarb Pie, and Vegetable Medley |
| Kent | Fiddlehead Risotto and Roasted Hazelnuts |
| Krobus | Diamond, Iridium Bar, Pumpkin, Void Egg, Void Mayonnaise, and Wild Horseradish |
| Leah | Goat Cheese, Poppyseed Muffin, Salad, Stir Fry, Truffle, Vegetable Medley, and Wine |
| Leo | Duck Feather, Mango, Ostrich Egg, and Poi |
| Lewis | Autumn’s Bounty, Glazed Yams, Green Tea, Hot Pepper, and Vegetable Medley |
| Linus | Blueberry Tart, Cactus Fruit, Coconut, Dish O’ The Sea, and Yam |
| Marnie | Diamond, Farmer’s Lunch, Pink Cake, and Pumpkin Pie |
| Maru | Battery Pack, Cauliflower, Cheese Cauliflower, Diamond, Gold Bar, Iridium Bar, Miner’s Treat, Pepper Poppers, Radioactive Bar, Rhubarb Pie, and Strawberry |
| Pam | Beer, Cactus Fruit, Glazed Yams, Mead, Pale Ale, Parsnip, Parsnip Soup, and Pina Colada |
| Penny | Diamond, Emerald, Melon, Poppy, Poppyseed Muffin, Red Plate, Roots Platter, Sandfish, and Tom Kha Soup |
| Pierre | Fried Calamari |
| Robin | Goat Cheese, Peach, and Spaghetti |
| Sam | Cactus Fruit, Maple Bar, Pizza, and Tigerseye |
| Sandy | Crocus, Daffodil, Mango Sticky Rice, and Sweet Pea |
| Sebastian | Frozen Tear, Obsidian, Pumpkin Soup, Sashimi, and Void Egg |
| Shane | Beer, Hot Pepper, Pepper Poppers, and Pizza |
| Vincent | Cranberry Candy, Ginger Ale, Grape, Pink Cake, and Snail |
| Willy | Catfish, Diamond, Iridium Bar, Mead, Octopus, Pumpkin, Sea Cucumber, and Sturgeon |
| Wizard | Purple Mushroom, Solar Essence, Super Cucumber, and Void Essence |
There are several NPCs that you can’t befriend, such as Gunther, Professor Snail, Birdy, and so many more side characters. While they all play a significant role in-game, it’s still fun to know new faces.
- Marriage Opportunities
In-game, you have an option to pick a spouse or roommate. While there’s one you can spend the rest of your life with, it’s the opposite for dating. You can be a playboy or playgirl if you even dare with your conscience by giving them a Bouquet. Of course, the next step if you’re committed is offering a Mermaid’s Pendant.
On the other hand, Krobus will accept a Void Pendant after you reach max hearts as a normal relationship would be. Instead of a sweet kiss is a warm embrace from this Void Person.
A remarkable experience is how Stardew Valley’s creator, Eric Barone, is open to same-sex marriage. He makes the game LGBTQ-friendly, letting you propose to the one you love regardless of gender.
One ultimate warning: Never date all villagers for fun, or you might get dumped all at once. But if you want to do something about the issue, Prismatic Shard can help!
3. Discover Every Way to Earn Money
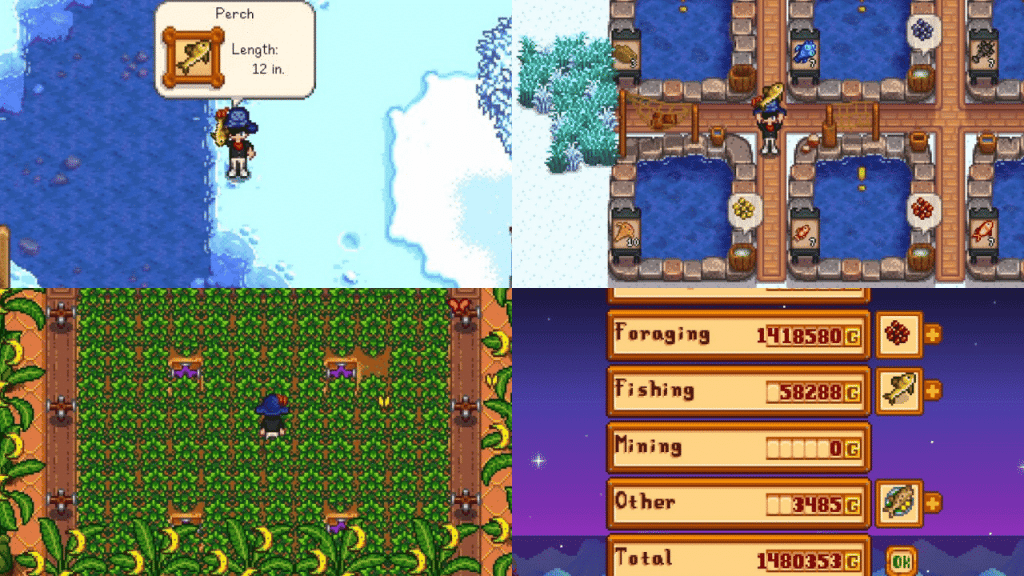
Surviving in Stardew Valley is a matter of getting enough gold to pass through the first Winter until your farm becomes stable. It’s pretty challenging as the starting 500g, and a few Parsnip Seeds are all you have. Even if you get something, you’ll ultimately invest them into seeds to give you more return.
For many beginners, the first year is a rough start. Fishing is a decent alternative, but it won’t give you easy gold if you don’t know how the mechanics work. Even if you’re experienced in the mini-game, you’ll need to fish at the right spot.
Another basic moneymaking method for newbies is selling items you find in the wild. It’s well-known as Foraging, where seasonal items are scattered across the map. We won’t spoil everything, but you can check this complete guide if you want to reach maximum profitability in Stardew Valley.
4. Trying Different Farm Maps
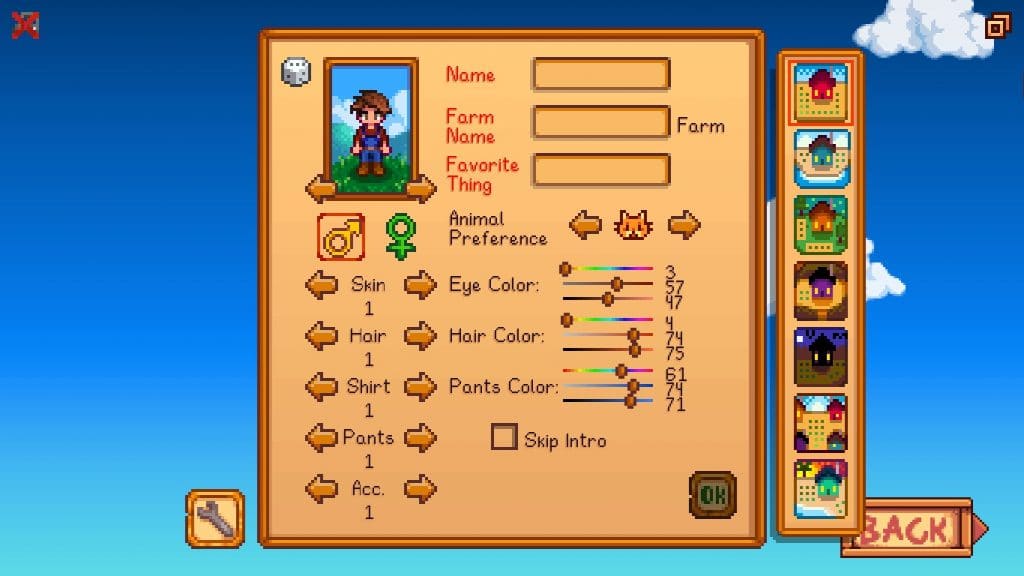
In update 1.1, four new maps were added to the game – bringing extra spiciness and a little diversity to the gameplay. Those were Hill-top, Riverland, and Wilderness with distinctive features.
The Standard Farm map is what most players like you will choose on the first playthrough. The sole purpose is to plant and harvest crops, fruit trees, and regular trees. However, you may also bring in Fish Pond farming, Ranching, or even building Sheds for Artisan Equipment!
If you’re starting a new game, don’t just rely on the plain layout. More opportunities are waiting, and we’ll discuss everything about the remaining farm maps:
Beach Farm

Wear that summer outfit because a Beach Farm functions as the name says! Start by cleaning the overgrown mess, and you can enjoy the beautiful scenery!
Pros:
- Great for Foraging since you’ll get Supply Crates containing different items and random Beach drops.
- Ocean fishes are abundant in this layout, and Crab Pot farming is a significant deal-breaker.
Cons:
- Sprinklers won’t activate in the sand.
- Manual farming only.
- For players with extensive experience in getting money outside farming.
- Crab Pot fishes are limited to Oyster, Coral, Mussel, and Cockle (5.1%).
- Roughly 27% chance of getting Junk Items and Seaweed (15%)
The Beach Farm has 2700 tillable tiles where you can plant crops. However, it’s not the best way to go as other moneymaking options work better. Examples are Artisan Goods production, Ranching, and duplicating Minerals.
However, there are 202 tiles where you can perfectly place nine working Sprinklers. You may also want to fix the Greenhouse or travel to Ginger Island if you long for that farming experience.
Forest Farm

Bring the Secret Woods at your convenience by selecting the Forest Farm! The main highlights are the beautiful landscape, more greens, and a stable supply of Hardwood! This layout is Leah’s haven if you want to get the artist’s heart.
Pros:
- Features seasonal foraged goods including Leek, Morel, Wild Horseradish, Common Mushroom, Grape, Spice Berry, Sweet Pea, Chanterelle, Purple Mushroom, and Red Mushroom. Each has a 25% chance of spawning daily, so you won’t run out of sources!
- Berry bushes are present where Salmonberries or Blackberries will appear during Spring and Fall!
- Aside from seasonal foraged goods, the Forest Farm offers eight stumps of Hardwood and weeds that drops Fiber when cut.
- Fishing is available, and you can catch Pond and River Fish (45% chance). Woodskip is a rarer loot that appears depending on your Luck.
Cons:
- Farming is strictly limited.
- Junk items are still a possibility even at the highest Luck.
There are 1413 free spaces to put crops in the Forest Map. While the remaining 1490 are non-tillable, you can still build infrastructures.
Four Corners Farm

Ever since the Multiplayer mode became available in Stardew Valley, the Four Corners layout has been the best choice for players. The reason is simple: it has four quadrants, including Forest, River, Standard, and Hilltop layouts.
Pros:
- Planting crops is ideal with its 2952 tillable tiles. Moreover, you can build any structures on non-tillable tiles.
- Fiber, Mixed Seeds, and Hardwood loots.
- Pond fishes available (50% chance).
- A mini-quarry that generates Stone, Ore, and Geode.
Cons:
- Four cliffs separating every quadrant take a massive space that you could’ve turned into a farm.
Hill-top Farm
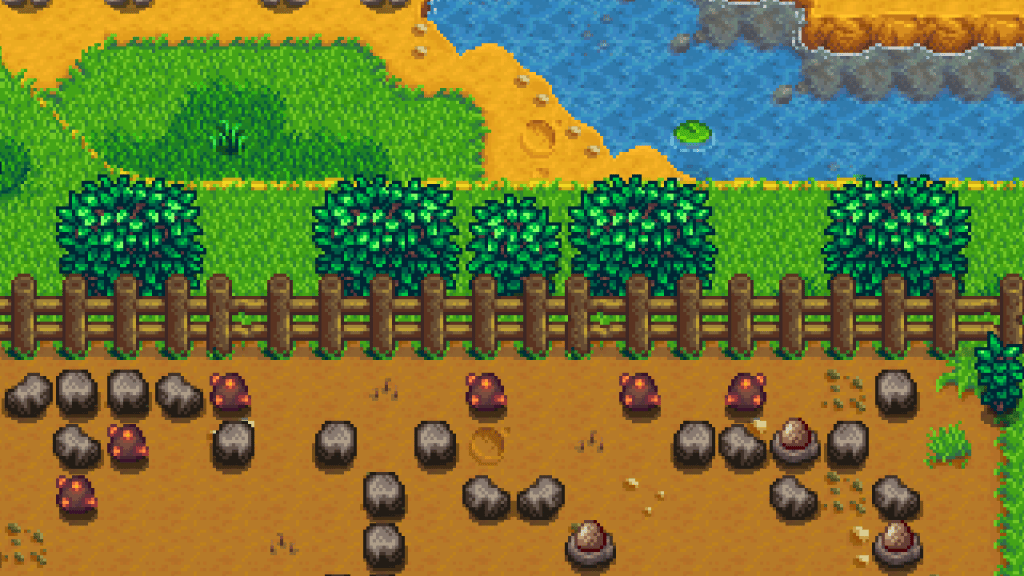
It’s been a convenience since the Hill-top Farm came to Stardew Valley for many reasons. The best and primary benefit is an easier way of gathering stones and ores you can use for crafting. But the countless perks don’t end there.
Pros:
- A clearable area (ideally on the fourth day) where seven to 13 random items spawn.
- Forest river fishes are a possibility to obtain (50% chance).
Cons:
- A Large Stump, Boulder, or Large Log may block the Quarry’s entrance, and you’ll need to remove it first. This ordeal inevitably makes the Hill-top Farm not usable in the early game.
- There’s a 50% chance of getting Junk Items while fishing.
- Cliffs and a stream of water render less space than usual.
You can plant up to 1648 crops in this layout, while the remaining 930 non-tillable tiles are suitable for building.
Riverland Farm
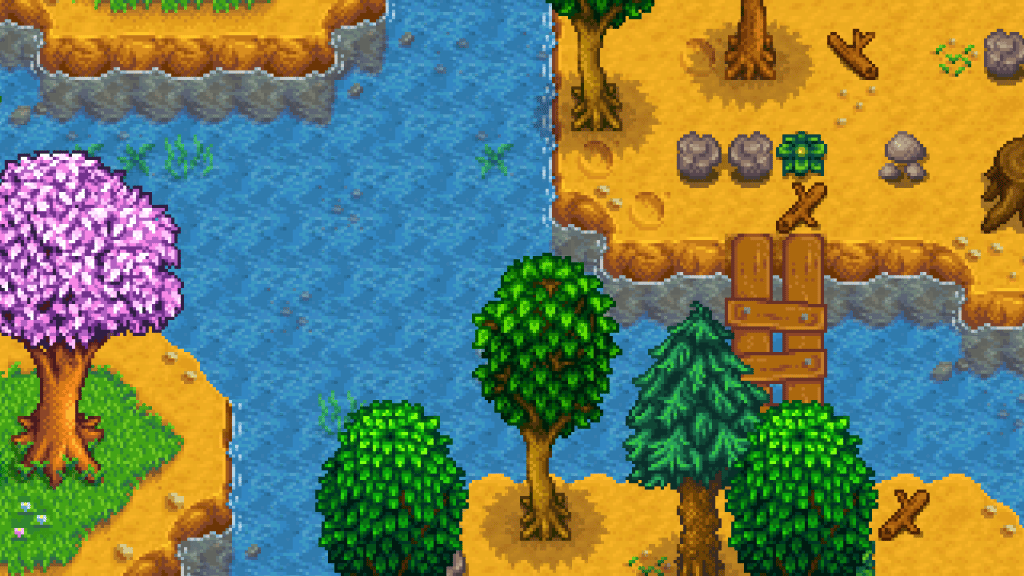
On almost every corner in Stardew Valley exists a body of water where you can reel in delicious sea creatures. However, the Riverland Farm adds a more extreme deal where you can’t almost build a stable farming location. Albeit it has 1578 tiles for planting, 516 tiles for buildings is one of the greatest drawbacks.
Pros:
- Fishing is a 100% guarantee on Riverland Farm. Town river fishes are dominant at 70% chance while the 30% remaining is for forest fishes.
Cons:
- Early game could become a little trouble, especially with little land.
- Difficulty in building farms other than crops is significant.
Wilderness Farm
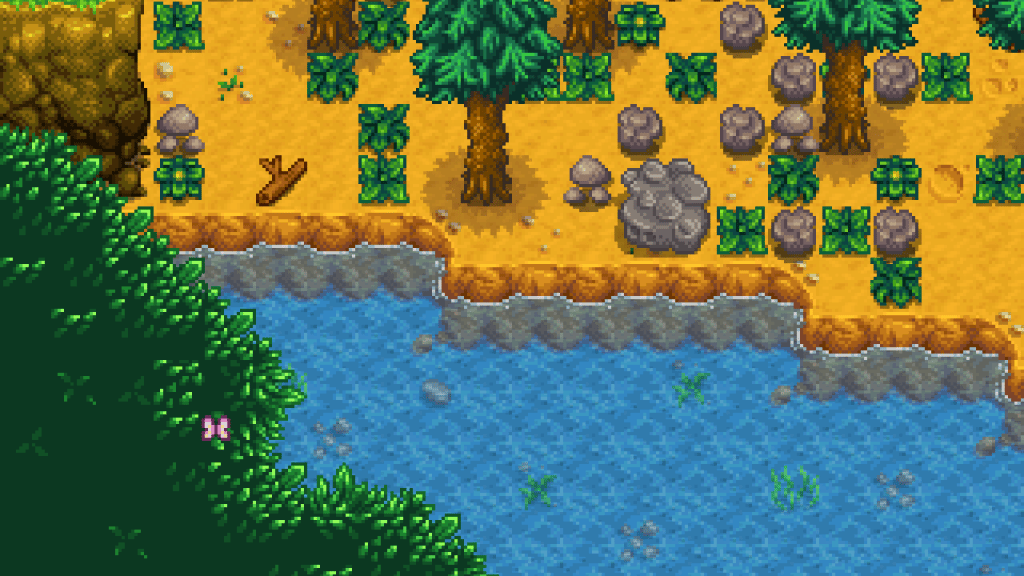
Sometimes, your home is not the friendliest place you might’ve thought. That’s because monsters appear at night in the Wilderness Farm, ready to tear you. Assuming you’re safe from the curse? Be careful as you don’t want to be bested by them. You’ll need Marlon’s help – or maybe run away to the safe place.
Pros:
- Since combat is early, you’ll feel more compelled to move faster and wiser! It’s an extra joy if you’re up for the challenge.
- Fishing is still possible where you can catch lake fish (35% chance).
- Great for farming!
Cons:
- Monster difficulty and variety increase as you level up. Consider preparing to be sure!
- Junk Items dominate the waters here (65% of the time).
Each farm map focuses on the specialization you want to level up the fastest. For example, the Wilderness Farm will help unlock Combat-related items or craftables.
5. Finish the Monster Eradication Goals

It’s both rewarding and burdening to think that you’ll have to kill monsters to protect Stardew Valley. They’re not even going outside the Mines at night or attacking villagers. But there it is, the locals won’t take their chances, and your arrival is timely.
Meeting with Marlon at the Mines is the first step. Your first weapon is a Rusty Sword which deals awful damage to the enemies. It’s not lethal enough to one-hit slimes, but it does the job.
How can you defeat hordes of hostiles with a bad weapon? Well, the Adventurer’s Guild is a huge help. However, you’ll need to reach the bottom further while mining to unlock a better arsenal. But it’s not an excellent idea as it’ll cost a lot. Consider relying on random drops if you want to save.
Monster Eradication Goals need you to defeat a specific number of different enemies. It also tracks your progress – whether you reached the goal or surpassed what’s required. It’s one of the best things to do in Stardew Valley because of the challenge and exciting gameplay.
But before murdering those pesky underground denizens, make sure to bring food items with perks. You’ll need them to survive and be a step ahead of the fight!
Here’s every monster you’ll need to fend off with their locations and corresponding rewards:
| Monster Type | Number to Slay | Floor(s) | Combat Tips | Reward | Reward Purpose |
| Bats | 200 | 31 to 119 (some are found on the Skull Cavern, Wilderness Farm, and Dangerous Mines). | Strike first and be aggressive. They’re usually slow, but a swarm is intimidating. If you’re using a Sword or Hammer, always perform Special Moves. Using a Dagger isn’t ideal. | Vampire Ring | Lets you heal a little after killing a monster. |
| Cave Insects | 125 | 1 to 39 (some are found on Skull Cavern, Mutant Bug Lair, and Dangerous Mines). | Ignore Armored Bugs if you don’t have the Bug Killer perk. The rest are killable, although you’ll have to fend them off more often as they’re aggressive. | Insect Head | A weapon with decent damage. |
| Duggies | 30 | 6 to 29 (variations exist on the Dangerous Mines and Volcano Dungeon). | Keep moving until they pop themselves before hitting them with a weapon. | Hard Hat | An equippable hat. |
| Dust Sprites | 500 | 41 to 79 | Dust Sprites are easy to defeat with few weapon swings. | Burglar’s Ring | Better chance of dropping loots upon slaying a monster. |
| Magma Sprites | 150 | Volcano Dungeon All Floors | For the regular ones, strike them at a manageable distance. Use Special Moves (preferably from a Sword to block swarms). You’ll need the best timing for Magma Sparkers as they can apply Slow. Best to stop them with a Sword when they’re about to charge. | Marlon’s Phone Number | For Item Recovery Service using a Telephone. |
| Mummies | 100 | Skull Cavern All Floors | Get the Crusader perk for your weapon, ignore them, or kill them and drop bombs. | Arcane Hat | A wearable hat. |
| Pepper Rex | 50 | Skull Cavern Prehistoric Floors (randomly generated). | Back away first as they spew fire breath. Once they stopped, that’s when to strike. | Knight’s Helmet | A wearable hat. |
| Rock Crabs | 60 | 1 to 29; 80 to 119 (can also be found in the Skull Cavern at floors 26+). | Use Pickaxe as they’ll move if you strike them. Any weapon will also do as a damage text will appear. For a quick fix, use bombs so they’ll retreat away from you, and you can finish them. | Crabshell Ring | +5 Defense Stats |
| Serpents | 250 | All Floors in Skull Cavern | Make sure to zoom out your game to see incoming Serpents. They’re mobile, and you need to time it correctly, or just spam swing your Sword (preferable weapon). Royal Serpents are harder as their segment can damage you. You can choose to contend them by using Swords or Hammers (fully utilizing Special Moves) or use a Staircase to evade them. | Napalm Ring | Makes a dying enemy explode, destroying rocks and damaging items at a small vicinity. Napalm Ring don’t do damage to the player. |
| Skeletons | 50 | 71 to 79 | The regular and dangerous version has the same behavior. Kill them first before they get you. However, be wary of their projectiles (that you can block or destroy). Skeleton Mages raise their hands before casting a freezing spell – that’s the time to dodge. After that, feel free to strike them and repeat the process until they’re defeated. | Skeleton Mask | A wearable hat. |
| Slimes | 1000 | Everywhere (The Mines, Skull Cavern, Quarry Mine, Tiger Slime Grove, and Volcano Dungeon). | Small Slimes are easy to kill as you can isolate and kill each. Big Slimes may be easier, but it will sometimes burst into a group that may intimidate you. | Slime Charmer Ring | Prevents Slime damage, making Slime Hutch farming safe. |
| Void Spirits | 150 | 81 to 119 | Shadow Brute is the easiest to kill despite having a high knockback resistance. Shadow Shamans are soft and easy to kill, so prioritize them as they can heal enemies. They’ll also make it obvious before casting Jinx, so you have time to dodge. Shadow Snipers will stop and can only shoot at a straight line – use that moment to attack them. | Savage Ring | Slaying a monster gives you a short speed boost. |
6. Discover All Secret Notes

Several backstories and hidden lore are shrouded in mystery in Stardew Valley. Even if you’re a veteran, you might miss some of the most controversial topics within the game.
We won’t spoil every secret note as we don’t want to ruin the fun. However, there are 25 in total, which give clues about something or lead to another secret.
Before starting to find a secret note, you’ll need a Magnifying Glass so that when you dig, it’ll randomly appear. It’s obtainable after completing the quest “A Winter Mystery”, where a Shadow Guy startles and runs away after seeing you at the Bus Stop. The cutscene happens during Winter between 6am and 4pm.
Krobus is the primary speculation as to the Shadow Person’s identity. Remember that he apologizes after finding it at the Playground near the Community Centre. It’s also worth noting that the mysterious creature appears friendly – something that the underground denizens of the same race will never do.
Digging, mining, fishing, killing monsters, or chopping trees may yield a Secret Note.
7. Donating to the Museum
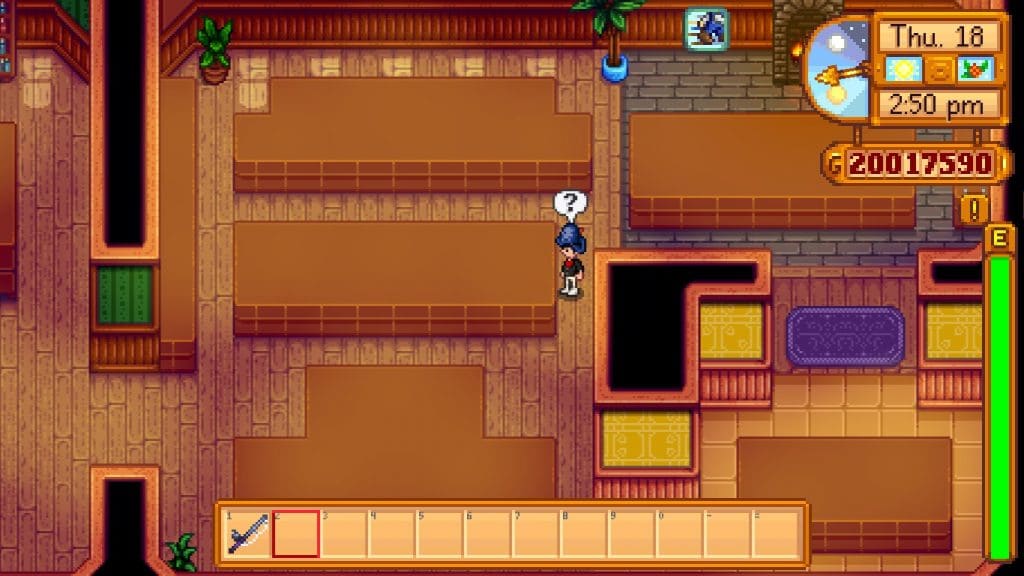
Completing Gunther’s Local Museum is as rewarding as the Island Field Office run by Professor Snail. It’s empty and lifeless at first until you start finding valuable gems, minerals, and artifacts. In the end, you’ll amass generous rewards that are both amazing and interesting.
In total, you can donate 95 minerals and artifacts, where you can also customize how it’s presented.
Gems and Minerals are the most common and donated by new Stardew Valley players. You can get at least one valuable item wherever you’re in the game because they’re naturally abundant. In the following table is a list of every mineral and gem and where to get them:
| Gems | Sources |
| Amethyst | Amethyst Node, Fishing Treasure Chest, Garbage Can, Gem Node, Green Slimes, and Panning |
| Aquamarine | Aquamarine Node, Fishing Treasure Chest, Garbage Can, Gem Node, and Panning. |
| Diamond | Diamond Node, Fishing Treasure Chest, Garbage Can, Gem Node, and Panning. |
| Emerald | Emerald Node, Feast of the Winter Star (as a gift), Fishing Treasure Chest, Garbage Can, Gem Node, and Panning. |
| Jade | Blue Slimes, Feast of the Winter Star, Fishing Treasure Chest, Garbage Can, Gem Node, and Jade Node. |
| Prismatic Shard | Fishing Treasure Chest, Iridium Node, Mummy, Mystic Stone, Omni Geode, Serpent, Shadow Brute, and Shadow Shaman. |
| Ruby | Feast of the Winter Star (present), Fishing Treasure Chest, Garbage Can, Gem Node, Panning, and Ruby Node. |
| Topaz | Fishing Treasure Chest, Garbage Can, Gem Node, Panning, and Topaz Node |
| Foraged Minerals | Sources |
| Earth Crystal | Floors 1-39, Duggy, Fishing Treasure Chest, Garbage Can, Geode, Haunted Skull, Omni Geode, and Panning. |
| Fire Quartz | Floors 80-120, Fishing Treasure Chest, Garbage Can, Magma Geode, Omni Geode, and Panning. |
| Frozen Tear | Floors 40-79, Dust Sprite, Fishing Treasure Chest, Frozen Geode, Garbage Can, Omni Geode, and Panning. |
| Quartz | Floors 1-120, Garbage Can, and Stone Golem. |
It’s a lot of work but still fun and rewarding when you’re exploring those different possibilities. While you’ll encounter challenges, it’s still worthwhile as we’ll spoil the prizes later.
The remaining Minerals you can donate are inside Geodes – a deposit that you can find almost everywhere. Omni Geodes – for example – is abundant in Ginger Island. However, we’re limiting the sources to only the Mines and Skull Cavern.
Regular Geodes are found on floors 1 to 39. Frozen Geodes are on levels 41 to 79, and the remaining floors contain Magma Geodes. Omni Geodes are available at any level, and for all types, you can find them on any floor at the Skull Cavern.
The following table features all geode minerals and what type of geode you can find inside them:
| Geode Mineral | Normal Geode | Frozen Geode | Magma Geode | Omni Geode | Other Sources |
| Aerinite | ✓ | ✓ | |||
| Alamite | ✓ | ✓ | |||
| Baryte | ✓ | ✓ | |||
| Basalt | ✓ | ✓ | |||
| Bixite | ✓ | ✓ | Black Slimes | ||
| Calcite | ✓ | ✓ | |||
| Celestine | ✓ | ✓ | |||
| Dolomite | ✓ | ✓ | |||
| Esperite | ✓ | ✓ | |||
| Fairy Stone | ✓ | ✓ | |||
| Fire Opal | ✓ | ✓ | |||
| Fluorapatite | ✓ | ✓ | |||
| Geminite | ✓ | ✓ | |||
| Ghost Crystal | ✓ | ✓ | |||
| Granite | ✓ | ✓ | |||
| Helvite | ✓ | ✓ | |||
| Hematite | ✓ | ✓ | |||
| Jagoite | ✓ | ✓ | |||
| Jamborite | ✓ | ✓ | |||
| Jasper | ✓ | ✓ | |||
| Kyanite | ✓ | ✓ | |||
| Lemon Stone | ✓ | ✓ | |||
| Limestone | ✓ | ✓ | |||
| Lunarite | ✓ | ✓ | |||
| Malachite | ✓ | ✓ | |||
| Marble | ✓ | ✓ | |||
| Mudstone | ✓ | ✓ | |||
| Nekoite | ✓ | ✓ | |||
| Neptunite | ✓ | ✓ | Black Slimes | ||
| Obsidian | ✓ | ✓ | |||
| Ocean Stone | ✓ | ✓ | |||
| Opal | ✓ | ✓ | |||
| Orpiment | ✓ | ✓ | |||
| Petrified Slime | ✓ | ✓ | Slime Balls | ||
| Pyrite | ✓ | ✓ | |||
| Sandstone | ✓ | ✓ | |||
| Slate | ✓ | ✓ | |||
| Soapstone | ✓ | ✓ | |||
| Star Shards | ✓ | ✓ | |||
| Thunder Egg | ✓ | ✓ | |||
| Tigerseye | ✓ | ✓ |
The final set for completing the Local Museum is Artifacts. The following list are all treasures with different ways and locations to get them:
| Artifact | Sources (Artifact Spots and other ways) |
| Amphibian Fossil | Bone Nodes, Fishing Chest, Forest, and Mountain. |
| Anchor | Artifact Trove, Beach, and Fishing Chest. |
| Ancient Doll | Artifact Trove, Bus Stop, Feast of the Winter Star, Fishing Chest, Forest, Mountain, and Town. |
| Ancient Drum | Artifact Trove, Bus Stop, Forest, Frozen Geode, Omni Geode, and Town. |
| Ancient Seed | Artifact Trove, Fishing Chest, Forest, Mountain, Bug, Cave Fly, Grub, Mutant Fly, and Mutant Grub. |
| Ancient Sword | Artifact Trove, Fishing Chest, Forest, and Mountain. |
| Arrowhead | Artifact Trove, Bus Stop, Forest, and Mountain. |
| Bone Flute | Artifact Trove, Fishing Chest, Forest, Mountain, and Town. |
| Chewing Stick | Artifact Trove, Duggy, Fishing Chest, Forest, Mountain, and Town. |
| Chicken Statue | Artifact Trove, Farm, and Fishing Chest. |
| Chipped Amphora | Artifact Trove and Town. |
| Dinosaur Egg | Fishing Chest, Mountain, Pepper Rex, Prehistoric Floors (Skull Cavern foraging). |
| Dried Starfish | Artifact Trove, Beach, and Fishing Chest. |
| Dwarf Gadget | Artifact Trove, Magma Geode, Omni Geode, and Mines dirt. |
| Dwarf Scroll I | Mines and Skull Caverns dirt and monster drops. |
| Dwarf Scroll II | Mines dirt, Ghost, Frost Bat, Dust Sprite, and Blue Slime drops. |
| Dwarf Scroll III | Monster drops. |
| Dwarf Scroll IV | Mines dirt and monster drops. |
| Dwarvish Helm | Artifact Trove, Geode, Omni Geode, and Mines dirt. |
| Elvish Jewelry | Artifact Trove, Forest, and Fishing Chest. |
| Glass Shards | Artifact Trove, Beach, and Fishing Chest |
| Golden Mask | Artifact Trove and Desert. |
| Golden Relic | Artifact Trove and Desert. |
| Nautilus Fossil | Beach, Bone Nodes, and Fishing Chest. |
| Ornamental Fan | Artifact Trove, Beach, Fishing Chest, Forest, and Town. |
| Palm Fossil | Beach, Bone Nodes, Desert, and Forest. |
| Prehistoric Handaxe | Artifact Trove, Bus Stop, Forest, and Mountain. |
| Prehistoric Rib | Bone Nodes, Farm, Pepper Rex, and Town. |
| Prehistoric Scapula | Bone Nodes, Forest, Skeleton, and Town. |
| Prehistoric Skull | Bone Nodes, Haunted Skull, and Mountain. |
| Prehistoric Tibia | Bone Nodes, Forest, Pepper Rex, and Railroad. |
| Prehistoric Tool | Artifact Trove, Bus Stop, Fishing Chest, Forest, and Mountain. |
| Prehistoric Vertebra | Bone Nodes, Bus Stop, and Pepper Rex. |
| Rare Disc | Artifact Trove, Bats, Fishing Chest, Shadow Brute, Shadow Shaman, and Spider. |
| Rusty Cog | Artifact Trove, Fishing Chest, Mountain, and Mines and Skull Caverns dirt. |
| Rusty Spoon | Artifact Trove, Fishing Chest, Town, and Mines and Skull Caverns dirt. |
| Rusty Spur | Artifact Trove, Farm, Fishing Chest, and Mines and Skull Caverns dirt. |
| Skeletal Hand | Backwoods, Beach, Bone Nodes, and Haunted Skull. |
| Skeletal Tail | Bone Nodes, Fishing Chest, and Mines and Skull Cavern dirt. |
| Strange Doll (Green) | Beach, Bus Stop, Farm, Fishing Chest, Forest, Mountain, Secret Note #17, Town, and Mines and Skull Cavern dirt. |
| Strange Doll (Yellow) | Beach, Bus Stop, Farm, Fishing Chest, Forest, Mountain, Secret Note #18, Town, and Mines and Skull Cavern dirt. |
| Trilobite | Beach, Bone Nodes, Forest, and Mountain. |
Completing the Museum comes with awesome prizes that you can use or display! Here are all items you can get:
| Artifacts Count/Donations | Prize | Purpose |
| 11 (including Dwarf Gadget and Rare Disc) | ‘Burnt Offering’ | A hanged furniture for decoration. |
| 15 | Skeleton Statue | A statue perfectly depicting the monstrous skeleton below the Mines. It’s a piece of spooky furniture nonetheless. |
| 20 | Rarecrow #7 | Used for shooing crows away. |
| Any Artifacts (3) including an Ancient Drum | Drum Block | For creating music inside the game. |
| Any Artifacts (3) including a Bone Flute | Flute Block | For making music in-game. |
| Any Artifacts (5) including the Chicken Statue | Chicken Statue | It’s a placeable furniture of the item, except it’s a Brown Chicken. |
| Ancient Seed | Ancient Seed and crafting recipe. | Lets you grow Ancient Fruit – the second most valuable crop in-game. |
| Dwarf Scroll I to IV | Dwarvish Translation Guide | Helps you translate Dwarvish to English. |
| Prehistoric Scapula Prehistoric Skull, and Skeletal Hand | Sloth Skeleton L | A piece of furniture. |
| Prehistoric Rib and Prehistoric Vertebra | Sloth Skeleton M | A piece of furniture. |
| Prehistoric Tail and Prehistoric Tibia | Sloth Skeleton R | A piece of furniture. |
| Minerals Count/Donations | Prize | Purpose |
| 11 | Standing Geode | A beautiful Farmhouse decoration. |
| 21 | Singing Stone | An interactive decoration similar to the one in Ginger Island. |
| 31 | Obsidian Vase | A sturdy decoration. |
| 41 | Crystal Chair | Snow-themed furniture you can place. |
| 50 | Crystalarium | A machine for duplicating a mineral or gem of your choice. |
| Total Count | Prize | Purpose |
| 5 | Cauliflower Seeds (9) | For growing Cauliflowers – the highest-selling standard crop for Spring. |
| 10 | Melon Seeds (9) | For growing Melons – the best valued fruit during the Summer season. |
| 15 | Starfruit Seeds (1) | Grows into a Starfruit (the most profitable crop in Stardew Valley). |
| 20 | ‘A Night On Eco-Hill’ | A piece of painting. |
| 25 | ‘Jade Hills’ | A piece of painting. |
| 30 | Lg. Futan Bear | A decoration perfect for your children. |
| 35 | Pumpkin Seeds (9) | Grows into a Pumpkin – an inedible crop which sells high during Fall. |
| 40 | Rarecrow #8 | Scares a crow away. |
| 50 | Bear Statue | A large decoration for your Farmhouse. |
| 60 | Rusty Key | Opens the Sewer. |
| 70 | Triple Shot Espresso (3) | Packs thrice the punch of a regular Coffee. |
| 80 | Warp Totem: Farm (5) | Warps you to the Farm. |
| 90 | Magic Rock Candy | An invaluable one-time use item that gives the most buffs and perks in-game. |
| 95 (Complete Collection) | Stardrop | Permanently increases your Energy and Health points. |
8. Unlock the Movie Theater

The Movie Theater in Stardew Valley offers new cutscenes containing cute stories (sometimes creepy). It’s also a new hub to invite your wife, partner(s), or friends where you’ll get to have fun. This unique place becomes one of two options to befriend someone by giving them a snack or choosing the right film to watch.
However, having the best experience will take either a Joja Warehouse or an Abandoned JojaMart. The latter is at the playground (formerly the Community Center), where Morris can help you build the theaters. On the other hand, the former is available after the JojaMart closes, where you can sneak in to complete the Missing Bundle.
Here’s everything you’ll need:
- Prismatic Shard
- Dinosaur Mayonnaise
- Caviar
- Silver or better quality Wine
- Ancient Fruit (Gold Quality)
- Void Salmon (at least Gold Quality)
Aside from the Ginger Island update, visiting the Movie Theaters at least once a week with someone is relaxing. Eight movies are ready on cycle (four each year), 24 concession snacks to pick from, and an entertaining Crane Game. After beating Stardew Valley, we recommend building this area first!
9. Reach Level 100 in Skull Cavern
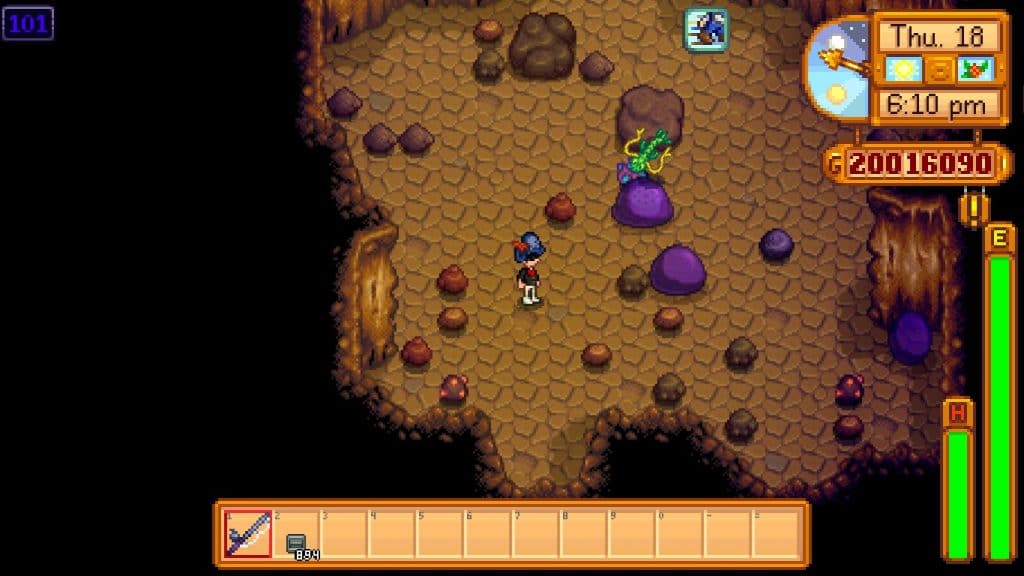
For context, the game generates near-infinite floors on Skull Cavern. As more levels you descend, you’ll encounter better loot and stronger monsters. That’s why it’ll be a stressful milestone to set foot on the 100th floor – but we have proven tips and tricks.
It’s possible to make this journey fun and enjoyable if you take the following guidelines to heart:
- Don’t Take Your Time. Yes, you’re racing against the clock, and you might even get to your destination at precisely 2am. It’s challenging to take pauses in-between floors (it’s okay if in-game) since monsters can also swarm you.
- Mind Your Stats. It’s crucial to stay intact in the whole course of your deep adventure in the Calico Desert. Bring the best food items to restore your Energy and Health, and don’t let them drop! Moreover, consider bringing cooked food such as Spicy Eel or Magic Rock Candy for great buffs!
- Bring Explosives. Even if you have an Iridium Pickaxe, it’s always best to stick with bombs. A quick fuse can deliver rapid work to help you find the ladder or hole that’ll significantly help your progress.
- Equip the Best Items. We’re talking about the best rings and their combinations, boots, and Galaxy Sword (if you don’t have the Galaxy Soul for forging). Have them in your arsenal, and you’ll be the strongest.
- No Ladders? Make One! It’s ideal to have a backup plan when all else fails. For example, it’s taking too long to find a ladder, or a swarm of Serpents is incoming. Thankfully, you can stack Staircases after the 1.4 version has been made. This QoL update helps to descend even more conveniently and doable.
- Manipulate Luck. After waking up and checking the Television, you may have a stroke of bad or good luck. If it’s the former, we recommend Lucky Rings, Special Charm, and food items to buff up your Luck. How fortunate you are will depend on how easily you’ll find ladders, deep holes, and even loots you can collect.
- Have a Solid Entrance and Exit Plan. You don’t need to spend millions on the Return Scepter. Although it can teleport you back home, it’s a pain in the inventory slot. It’s better to use one-time Warp Totem consumables to free spaces. However, ensure those mini-teleporters will take you to the Desert and Farmhouse.
10. Beat Junimo Kart
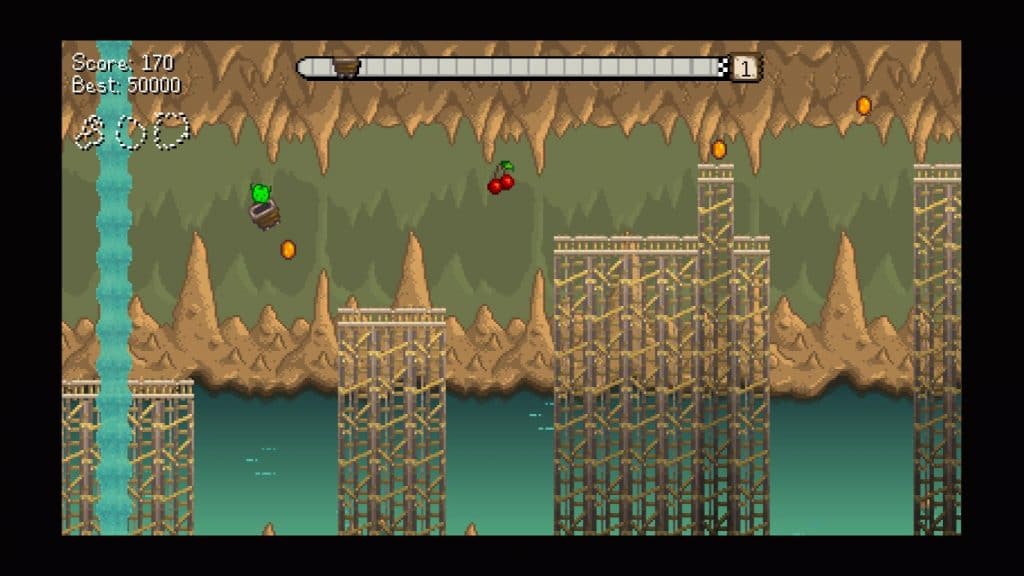
At the Stardrop Saloon’s game room, two arcade machines are present. One of them is Junimo Kart – a game set in the Mines (of sorts) where you control a Minecart, avoiding obstacles and reaching the finish line. It’s one of the most challenging mini-games since the controls can be a massive drawback.
Accessing the Junimo Kart requires the Skull Key – the same component for gaining entry to Skull Cavern. Focus on the Progress Mode since it’s how you can officially beat the arcade game. Even better, beating all six levels will let you keep a copy of the game at your Farmhouse!
Meanwhile, the Endless Mode has a hardcore difficulty since you only have a single chance. Otherwise, you’ll have to repeat everything from the beginning. If you’re eager to beat Mayor Lewis’ score or get those Qi Gems, spend time practicing!
11. Beat Journey of the Prairie King

Journey of the Prairie King is another arcade game you can finish. It’s a Wild West-themed shooter based on Prairie Island – a region in the Ferngill Republic. Similar to the Junimo Kart, completing this game will be stressful at first. However, it won’t be permanent as the game is easy to master.
There are things to remember when playing JOTPK. Your priority should focus on getting creds and power-ups as that will help you in the future. Moreover, choose the right upgrades that’ll highly depend on your skills. If you also spend time practicing, Journey of the Prairie King will be another Steam achievement.
12. Explore Ginger Island

Find new secrets and content while spending more gameplay hours at Ginger Island. It’s the biggest and freshest update so far, adding diversity to your play style. The island’s main features include new currencies, challenging missions, and more!
Reaching Ginger Island is easy – you only need to fix Willy’s boat for Hardwood (200), Battery Pack (5), and Iridium Bar (5). The rest of the process will focus on your trips, where you’ll pay 1000g to explore the tropical island!
13. Completing Every Qi’s Special Orders
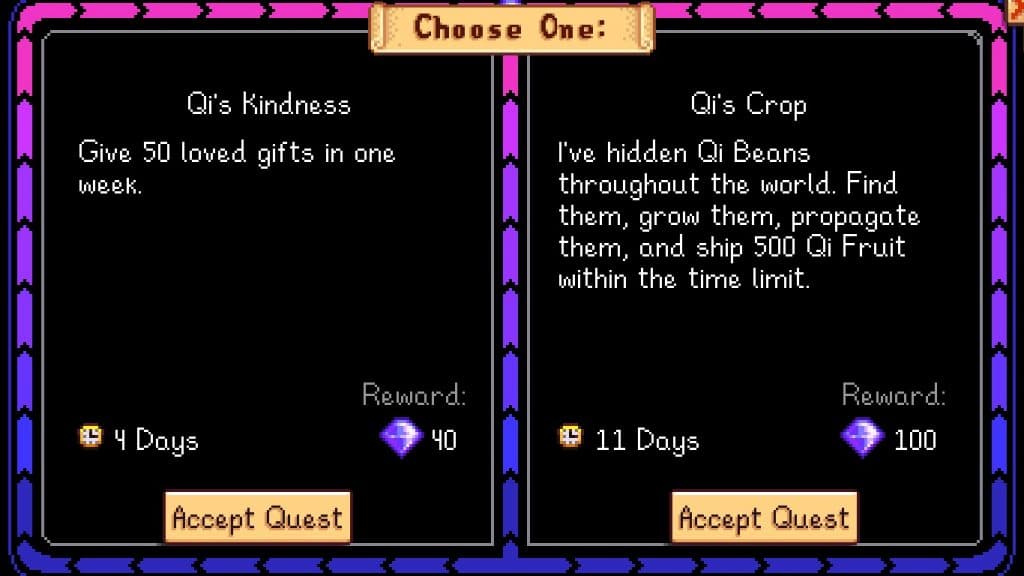
Speaking of challenging missions, Mr. Qi has a new set of milestones for you to finish. From collecting and delivering to killing and adventuring, there’s always an ideal task to finish! However, accessing the secret room requires you to have 100 Golden Walnuts in total.
Qi offers Gems that you can spend for new items, usually on higher tiers. You may not receive the most generous amount of the currency, but the prizes are worth getting.
14. Experimenting With the Forge

Going North at Ginger Island will lead you to a Volcano. What’s inside is different because you’ll encounter stronger foes! The place is not for sightseeing but an active site for gathering Cinder Shards.
Remember: having strong weapons and equipment is essential before traversing the molten area. A higher floor means worse enemies to encounter – but it’ll be easy if you rush your way through.
On the final floor is an enormous Forge for rings and weapons. Feel free to combine them or enhance them with buffs and permanent stats. However, the most overpowered set of arsenal in Stardew Valley is crafted in this large dwarvish anvil. If you’re looking to get Galaxy Weapons, the Forge is the go-to place.
Not sure about its purpose? Keep experimenting, and you might find something useful!
15. Be Perfect – Get the Statue of True Perfection

Grandpa taught us how you could easily acquire Iridium Ores by fulfilling his Evaluation before it’s Year 3. Before even touching the Skull Cavern, you might’ve high-tier tools because of the Statue of Perfection. But what if you can get its better version?
Complete the following tasks to progress with the Perfection Tracker – it’s where you can follow your hard work. Although it’ll take a while to achieve Perfection, we’ll include separate guides for every milestone:
- Ship Every Crop and Foraged Good
- Finish All Monster Slayer Goals
- Have Max Friends With Every NPC
- Construct All Obelisks
- Buy the Gold Clock
- Hunt Every Golden Walnut
- Craft All Items
- Catch All Fish
- Cook Every Recipe
- Reach Level 10 to All Skills
- Collect All Stardrops
How about making Grandpa feel proud even more of the thriving farm? Although it’s in your possession already, self-fulfill what he always wanted in Stardew Valley!
Tasks aside, the Statue of True Perfection will give a Prismatic Shard daily! Note that the mineral is extremely rare to find or reproduce, so this challenge will be the most fun despite the difficulty. Nonetheless, it’s worth every shot!
16. A Complete Rarecrow Collection

Rarecrows are the combination of dressing up regular Scarecrows in Stardew Valley. Although both have indistinguishable functions, the former adds style and a bit of a secret. However, let’s first find every Rarecrow that exists in the game. Here are the prices with the locations:
| Locations/Events | Prices |
| Stardew Valley Fair | 800 Star Tokens |
| Spirit’s Eve | 5,000g |
| Casino | 10,000 Qi Coins |
| Festival of Ice or Traveling Cart | 4,000g – 5,000g |
| Flower Dance | 2,500g |
| The Mines from Dwarf | 2,500g |
| Museum | Donating 20 Artifacts |
| Museum | Donating 40 Items (could be Minerals or Artifacts combined) |
Fun Fact: The Alien Scarecrow lets you put any headwear on its head. Also, completing all Rarecrows will let you unlock the Deluxe Scarecrow and its crafting recipe. This farm prop can shoo more crows away for as wide as 16 radii of tiles!
17. Build Expensive Obelisks

Isn’t spending money on a game a recent trend? But what if it doesn’t have to be a real dollar? Fortunately, there are different ways to burn your cash in Stardew Valley, and one of them is creating Obelisks.
Depending on the type, an Obelisk can transport you to almost anywhere! Here’s how much would it cost to build them and where your destination will be:
| Type | Building Cost | Teleports to |
| Desert Obelisk | Cactus Fruit (10), Coconut (10), Iridium Bar (20), 1,000,000g | Calico Desert |
| Earth Obelisk | Earth Crystal (10), Iridium Bar (10), 500,000g | The Mountains |
| Farm Obelisk | Golden Walnuts (20) – available from Ginger Island only. | Farmhouse |
| Island Obelisk | Banana (10), Dragon Tooth (10), Iridium Bar (10), 1,000,000g | Ginger Island |
| Water Obelisk | Clam (10), Coral (10), Iridium Bar (5), 500,000g | The Beach |
Despite being expensive, Obelisks are a great alternative in crafting too many Warp Totems. Sometimes, making the latter can be a hassle unless you have materials ready.
18. Completionist – 100% Achievement!

Many Stardew players aim to get every achievement in-game and on Steam. There are more to finish in the latter because of secret milestones! However, the choice will depend on whether a 100% completed game is enough for you.
There’s little gain from completing every Stardew Valley achievement except new content you can access. But achieving this goal is more fun by letting the gameplay flow naturally without stressing too much. Keep on gaming and enjoy the game! It’s not a competitive title, after all.
19. Modding

Sometimes, the Vanilla version will taste too plain for regular gameplay. You need that spice – new elements and aspects to address what are there to improve. They’re called mods, and ConcernedApe supports people who amplify his majestic game.
There are many big titles in the modding community. One is Stardew Valley Expanded which provides new content, visual redesigns, and more! Every mod has the previously mentioned aspects, but you can expect more or less depending on the title.
You can always download SMAPI and browse mods online if you don’t mind a minor modification.
Conclusion
Have you found what will work for you, or are you currently doing fun things to make Stardew Valley enjoyable? Surely, there might be other things to enjoy, so remember not to stress out and tell us your favorite hobbies!