Stardew Valley doesn’t solely focus on farming and fishing, as it involves combat too! This simplified guide will teach you all monster types and how to defeat them!

Combat is one of Stardew Valley’s gameplay mechanics. Aside from the subtle yet exciting chores like farming and fishing, you’ll experience what it’s like to be a hero. From Marlon and Gil‘s standards, you’re the “Protector of the Valley”.
Even if you’re starting from a Rusty Sword, you can still kill anything that moves at the right place. You’ll also get rewards ranging from rings and footwear to better weapons!
Ready the essentials and face every monster in Stardew Valley! This simple guide will introduce all mobs and how to defeat them easily. We’ve covered the Mines, Quarry Mine, Skull Cavern, and many more places.
Monsters – Overview
These hostile NPCs in Stardew Valley are scattered across The Mines, Quarry Mines, Skull Cavern, and Volcano Dungeon. You might encounter them at the Farm if you pick the Wilderness layout. They may also appear regardless of the map upon depositing a Strange Bun to the Dark Shrine of Night Terrors. You’ll find the Shrine inside the Witch’s Hut.
Monsters in Stardew Valley have different movements and attacking behaviors. Nonetheless, they’ll try inflicting damage or combat disadvantage until you pass out.
To increase their spawn rate, you must consume Monster Musk. Meanwhile, drinking Oil of Garlic will reduce their numbers.
The following are every in-game monster. We’ve simplified everything for you to guarantee a seamless victory whenever you encounter them while peacefully traversing Stardew Valley.
Bats
This monster type is one of many flying enemies in the game. There are six different bat variations:
- Normal Bat
- Normal Bat (Dangerous)
- Frost Bat
- Frost Bat (Dangerous)
- Lava Bat
- Iridium Bat
Upon entering their area, you might encounter Bats in their passive state (wings folded or hanging from a ceiling). Approaching them will make them aggressive and will start attacking you. They may also appear randomly in any direction after a screech.
The worst scenario that could happen is when a colored fog appears, followed by multiple Bat screeches. They can be overwhelming, especially to new players, so be extra cautious!
Fighting Tip: A Bat may attack you directly or reposition at another angle. They’re not that mobile, so we recommend striking them with a Sword in the vicinity at the right time. Note that Clubs and Daggers are bad weapon choices as they lack AoE. One more thing: Keep moving to dodge them if you feel outnumbered!
Reaching the 880th floor of the Skull Cavern (non-Prehistoric floors) will turn purple-colored Iridium Bats red regardless of odds. As a result, they’ll have 2x health and faster movement speed.
Bat

| Kill EXP | Damage | Health | Armor | Speed | Loot Materials | |
| 3 | 6 | 24 | 1 | 3 | Dwarf Scroll IV (0.1%) Rare Disc (0.1%) Dwarf Scroll I (0.5%) Bomb (2%) Bat Wings (94%) | |
| Dangerous Variant | 3 | 13 | 268 | 1 | 3 | Same loot |
Regular Bats are found on floors 31 to 39 of the Mines. They’re the second flying enemy you’ll encounter after Cave Flies.
Frost Bat

| Kill EXP | Damage | Health | Armor | Speed | Loot Materials | |
| 7 | 7 | 36 | 1 | 3 | Dwarf Scroll IV (0.1%) Rare Disc (0.1%) Dwarf Scroll II (0.5%) Bomb (2%) Bat Wings (95%) | |
| Dangerous Variant | 7 | 14 | 277 | 1 | 3 | Same drop |
Frost Bats are flying hostiles that dominate the Mines from floors 41 to 79. They act similarly to regular, Lava, and Iridium Bats.
Lava Bat

| Kill EXP | Damage | Health | Armor | Speed | Loot Materials |
| 15 | 15 | 80 | 1 | 3 | Dwarf Scroll IV (0.1%) Rare Disc (0.1%) Dwarf Scroll III (0.5%) Bomb (2%) Bat Wings (97%) |
Lava Bats appear on floors 81 to 119 of the Mines and the first 50 levels of the Skull Cavern. They’re tougher than regular Bats and Frost Bats but weaker than Iridium Bats.
Iridium Bat
| Kill EXP | Damage | Health | Armor | Speed | Loot Materials |
| 22 | 30 | 300 | 1 | 3 | Iridium Bar (0.8%) Battery Pack (5%) Energy Tonic (5%) Life Elixir (5%) Mega Bomb (5%) Solar Essence (50%) Iridium Ore (97%) |
Iridium Bats are the strongest (non-dangerous) type of Bat in Stardew Valley. They exclusively spawn in the Skull Cavern on Prehistoric Floors or floors 51 and above.
Blue Squid
A Blue Squid in Stardew Valley can easily overwhelm you because of its unique behavior. As they appear on the Mines on floors 11 to 29, they’ll “swim” towards you at irregular intervals. Blue Squids deal contact damage like every flying enemy. However, they may also shoot an orb, applying the Weakness debuff.
Fighting Tip: Blue Squids are one of the recent monsters introduced during the Ginger Island update. It’s unsurprising how this pesky calamari made everyone in the community frightened. But the good news is they’re pretty easy to deal with once you get used to them.
We recommend you keep moving during combat to avoid debuff orbs they occasionally fire. Moreover, it’s necessary to strike on your feet to finish them all off. If they surround you, use your Sword’s block ability once they’re about to charge.
Bug
| Kill EXP | Damage | Health | Armor | Speed | Loot Materials | |
| 1 | 8 | 1 | 0 | 2 | Diamond (0.05%) Prismatic Shard (0.05%) Dwarf Scroll IV (0.1%) Ancient Seed (0.5%) Dwarf Scroll I (0.5%) White Algae (2%) Bug Meat (76%) | |
| Dangerous Variant | 1 | 15 to 16 | 250 | 0 | 2 | Same loot |
Bugs are one of the easiest monsters to slay in the game. They’re vulnerable as they move at a fixed left, right, up, or down path. Take them out for extra Monster Eradication Goal points and Bait or stay out of their way.
Bugs appear on floors one to 39.
Armored Bug

| Kill EXP | Damage | Health | Armor | Speed | Loot Materials | |
| 1 | 8 | 1 | 0 | 2 | Diamond (0.05%) Prismatic Shard (0.05%) Dwarf Scroll IV (0.1%) Ancient Seed (0.5%) Dwarf Scroll I (0.5%) White Algae (2%) Bug Steak (10%) Bug Meat (76%) | |
| Dangerous Variant | 1 | 20 to 27 | 250 | 0 | 2 | Same drops |
Armored Bugs dominate many floors in the Skull Cavern. Despite their passive behavior (like their unarmored counterparts), they’ll still deal collision damage if you’re not careful.
Fighting Tip: You can either kill Armored Bugs or ignore them. If you choose the former, you’ll need the Bug Killer enchantment available for weapon augmentation from the Forge.
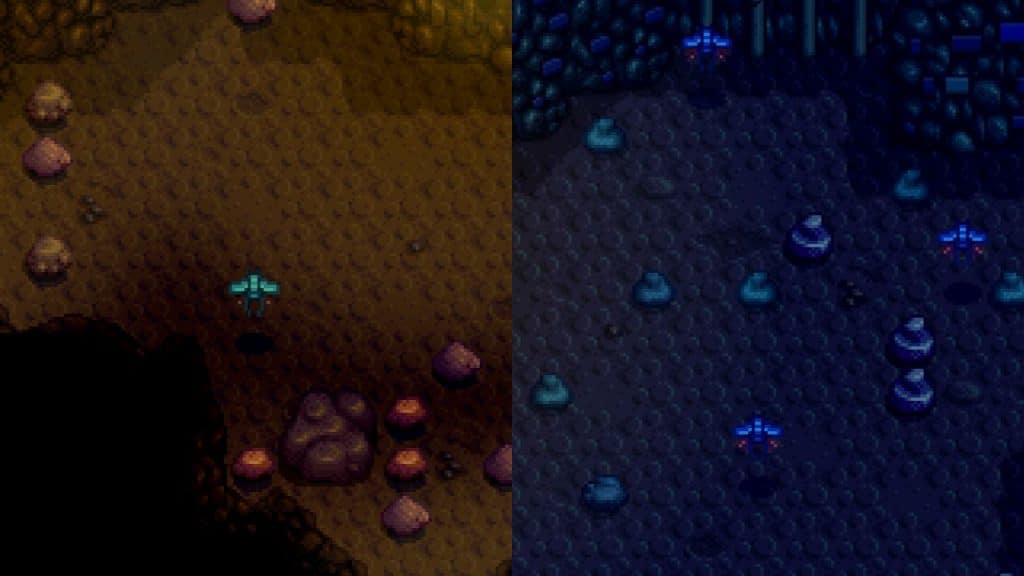
Cave Fly

| Kill EXP | Damage | Health | Armor | Speed | Loot Materials | |
| 10 | 6 | 22 | 1 | 2 | Diamond (0.05%) Prismatic Shard (0.05%) Dwarf Scroll IV (0.1%) Ancient Seed (0.5%) Dwarf Scroll I (0.5%) White Algae (2%) Bug Meat (90%) | |
| Dangerous Variant | 10 | 13 to 15 | 266 | 2 | 2 | Same drops |
A single Cave Fly can still be manageable for a low-level player. However, it’s the opposite if a group swarms you.
Cave Flies came from Grubs after entering their cocoon phase. After turning into their flying counterpart, they’ll directly attack you (through walls) and loop around for another trial.
A Cave Fly is found on floors one to 29. Meanwhile, its Dangerous version starts appearing only on levels 41 to 69.
Fighting Tip: If you’re a beginner, stand still and wait for them to dive attack you. Successfully hitting them will prepare them for another attempt, giving you more time to react. If you’re caught up in the Green Mist (swarm event), consider crafting a Staircase or Bombing your way out.
Grub
| Kill EXP | Damage | Health | Armor | Speed | Loot Materials | |
| 2 | 4 | 20 | 0 | 1 | Diamond (0.05%) Prismatic Shard (0.05%) Dwarf Scroll IV (0.1%) Ancient Seed (0.5%) Dwarf Scroll I (0.5%) White Algae (2%) Rice Shoot (10%) Bug Meat (60%) | |
| Dangerous Variant | 2 | 12 to 13 | 265 | 0 | 1 | Same loot |
Grubs are the more defenseless and basic version of Cave Flies. They have slow mobility and are incredibly vulnerable to attacks. This monster type will appear on floors 15 to 29 in the Regular Mines. Meanwhile, Dangerous Grubs start appearing on levels 41 to 69.
Initially, a Grub will attack upon seeing you. Eventually, it’ll flee away from you and try to pupate. When the process begins, it’ll cover itself in a blue-green cocoon that absorbs all damage.
Fighting Tip: Never let a Grub turn into a Cave Fly. Dealing with Cave Flies is risky, especially for a low-level character. If you see a Grub, kill it. If it tries to escape, chase them and swing your weapon.
Dealing with a group is trickier. However, you can still deal with them quickly by using a high-knockback weapon and trapping them in a spot. You may also use Explosive Ammo with a Slingshot, but it’s an expensive option.
Mutant Grub

| Kill EXP | Damage | Health | Armor | Speed | Loot Materials |
| 6 | 12 | 100 | 0 | 1 | Diamond (0.05%) Prismatic Shard (0.05%) Dwarf Scroll IV (0.1%) Ancient Seed (0.5%) Dwarf Scroll I (0.5%) White Algae (2%) Algae Soup (10%) Rice Shoot (10%) Bug Meat (60%) |
This monster inhabits the Mutant Bug Lair and acts similarly to the Grub in the Mines.
As they have lower health than their Mutant Fly counterpart, it’s best to kill them before pupating.
Mutant Fly

| Kill EXP | Damage | Health | Armor | Speed | Loot Materials |
| 10 | 12 | 66 | 1 | 2 | Diamond (0.05%) Prismatic Shard (0.05%) Dwarf Scroll IV (0.1%) Ancient Seed (0.5%) Dwarf Scroll I (0.5%) White Algae (2%) Bug Meat (90%) |
Mutant Flies inhabit the Mutant Bug Lair and have similar behavior to the one found in the Mines.
Despite their higher HP versus Cave Flies, Mutant Flies have no armor. Therefore, you might one-shot them with a Galaxy Sword.
Duggies
Duggies bury themselves on the soil, waiting to impale unsuspecting players. Thankfully, you can only find them in the Mines and Volcano Dungeon.
Once a Duggy emerges from the patch of dirt or snow, it’ll create a hole you can’t reverse. Their wake will prevent you from digging Cave Carrots or any Artifact with a Hoe, causing inconvenience.
Fighting Tip: The key to efficiently defeating Duggies is moving while still in the Dirt Patch. For their aggressive behavior, they’ll try to joust you from below, but they’re not fast enough. Swing your weapon at them and reposition. You may also bait them by moving toward the Dirt Patch and then returning to concrete tiles.
You can improve your reaction time by getting exposed to Duggies. If you’re in a vulnerable position and have no time to recover, use your Sword’s Special Move to negate damage.
Duggy

| Kill EXP | Damage | Health | Armor | Speed | Loot Materials | |
| 10 | 6 | 40 | 0 | 2 | Diamond (0.05% to 1%) Prismatic Shard (0.05%) Dwarf Scroll IV (0.1%) Dwarf Scroll I (0.5%) Chewing Stick (2%) Yam (3%) Earth Crystal (10%) Cherry Bomb (25%) Geode (25%) | |
| Dangerous Variant | 10 | 8 | 280 | 0 | 2 | Same drop |
From the 6th floor to 29th, Duggies dominate the dirt patches in the Mines of Stardew Valley. However, the Dangerous counterpart starts appearing in the first 29 levels of the Dangerous Mines.
Magma Duggy

| Kill EXP | Damage | Health | Armor | Speed | Loot Materials |
| 18 | 16 | 380 | 0 | 2 | Diamond (0.05%) Prismatic Shard (0.05%) Cinder Shard (15% to 40%) Mega Bomb (40%) Taro Tuber (50%) |
Magma Duggies are one of the three Duggy types in Stardew Valley. You may find them on all floors of the Volcano Dungeon.
Dust Sprite
| Kill EXP | Damage | Health | Armor | Speed | Loot Materials | |
| 2 | 6 | 40 | 2 | 3 | Diamond (0.05%) Prismatic Shard (0.05%) Dwarf Scroll IV (0.1%) Gold Bar (0.1%) Dwarf Scroll II (0.5%) Coffee Bean (1%) Crystal Fruit (2%) Frozen Tear (2%) Coal (50%) | |
| Dangerous Variant | 2 | 13 to 15 | 280 | 6 | 3 | Same drop |
From floors 41 to 79, you’ll encounter packs of Dust Sprites that’ll try to deal collision damage. Sometimes, they’ll break rocks on their way (which counts as your Mining XP). Note: Dangerous Dust Sprites appear on floors 41 to 69 of the Mines’ Dangerous State.
Fighting Tip: Killing Dust Sprites is relatively easy. Swing your Sword or Hammer with great knockbacks until they’re finished. They may respawn if you jump from one floor to another, but they’re not that harmful.
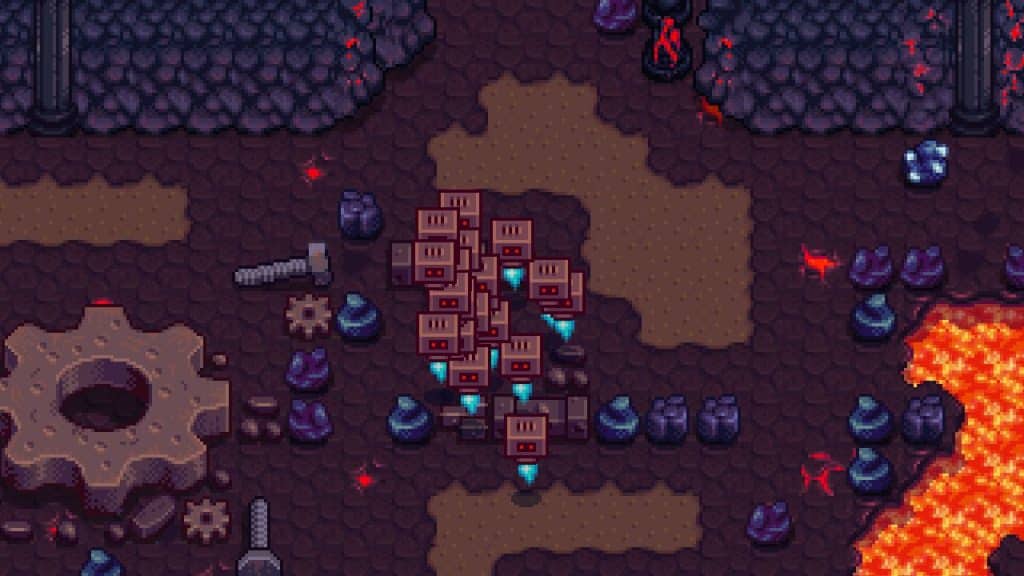
Dwarvish Sentry
| Kill EXP | Damage | Health | Armor | Speed | Loot Materials |
| 15 | 18 | 300 | 5 | 3 | Diamond (0.05% to 10%) Prismatic Shard (0.05%) Amethyst (10%) Aquamarine (10%) Emerald (10%) Jade (10%) Ruby (10%) Topaz (10%) |
Sometimes at the Volcano Dungeon, destroying a Metal Crate spawns the Dwarvish Sentry (24%). This slow-moving monster will attempt to deal collision damage. Albeit highly vulnerable, a Dwarvish Sentry is immune to knockback.
Fighting Tip: The best way to defeat Dwarvish Sentries is with any Sword. Although Daggers work perfectly, you’ll still have to deal with Magma Sprites and Magma Sparkers nearby. After consecutive swings, reposition yourself to a safer space until you defeat the Dwarvish Sentry.
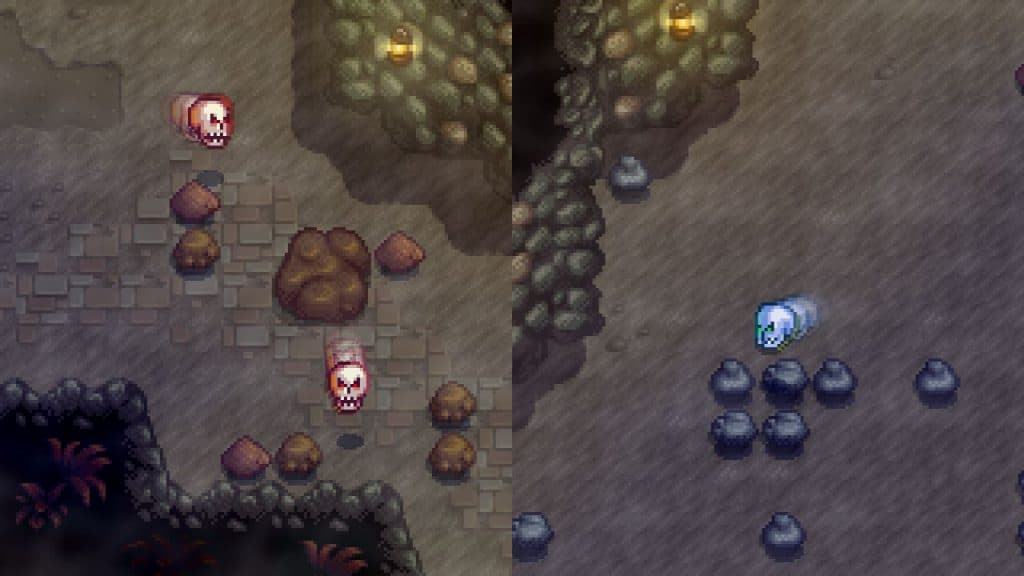
False Magma Cap

| Kill EXP | Damage | Health | Armor | Speed | Loot Materials |
| 14 | 15 | 290 | 3 | 3 | Diamond (0.05%) Prismatic Shard (0.05%) Cinder Shard (20% to 50%) Magma Cap (99%) |
The False Magma Cap is the only monster that disguises itself in Volcano Dungeon. It acts similarly to Rock Crabs, using stealth to attack if you’re not careful.
Fighting Tip: Spotting a False Magma Cap is easy. Since a Magma Cap is a forageable good, you’ll see the green “+” icon upon hovering your mouse cursor. If the icon isn’t present, it’s a False Magma Cap.
Killing them can quickly be done by swinging your weapon choice while repositioning to prevent getting damaged.
Ghosts
There are three different types of Ghosts in this monster family:
- Regular Ghost
- Carbon Ghost
- Putrid Ghost
Ghost

| Kill EXP | Damage | Health | Armor | Speed | Loot Materials |
| 15 | 10 | 96 | 3 | 4 | Diamond (0.05%) Prismatic Shard (0.05%) Dwarf Scroll IV (0.1%) Dwarf Scroll II (0.5%) Ghostfish (8%) Refined Quartz (8%) Ectoplasm (9.5% if the Special Order is active) Solar Essence (10% to 95%) Gold Ore (20%) |
You’ll start to find Ghosts in the Mines upon reaching the 51st floor until the 79th. They can phase through walls and black spaces as they move directly to you. If a Ghost hits you, it’ll teleport to a random location and repeat the process.
Fighting Tip: Ghosts will start attacking the player upon entering any floor mentioned above. We recommend using a weapon that deals enormous damage despite the attack speed versus Daggers. Successfully hitting will push them further away. You can approach them and swing more or wait until they reach the striking distance.
Carbon Ghost

| Kill EXP | Damage | Health | Armor | Speed | Loot Materials |
| 20 | 25 | 190 | 3 | 4 | Diamond (0.05%) Prismatic Shard (0.05%) Ectoplasm (9.5% during a Special Order) Refined Quartz (10%) Omni Geode (99%) |
Carbon Ghosts initially appear only in the Skull Cavern. However, with the Ginger Island update, you can now encounter them on the Mines after activating the Shrine of Challenge. Carbon Ghosts also appear on the Special Order “Danger in the Deep” to impede your progress (floors 31 to 39).
For our combat approach, we recommend applying the same one as regular Ghosts, as they behave the same.
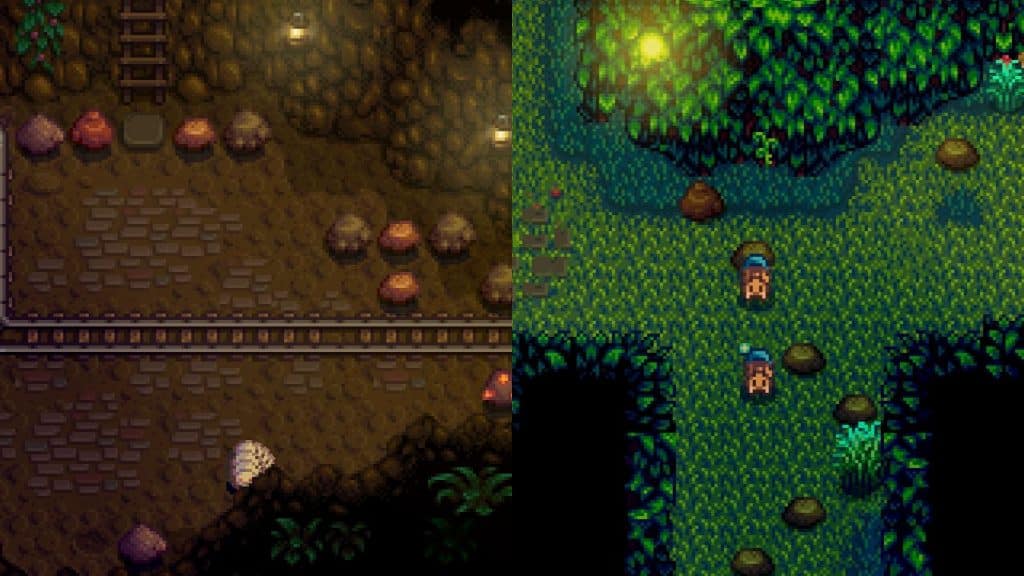
Putrid Ghost

| Kill EXP | Damage | Health | Armor | Speed | Loot Materials |
| 25 | 25 | 500 | 3 | 4 | Diamond (0.05%) Prismatic Shard (0.05%) Ectoplasm (9.5% during a Special Order) Omni Geode (99%) |
When the Mines is in its Dangerous state, the Putrid Ghost will spawn. Specifically, they’ll appear on floors 51 to 69 (Grassy/Forest area).
Once Putrid Ghosts are in the vicinity, they’ll slowly charge toward you as it passes through walls and dark spaces. It’ll get aggressive as it closes the distance until it deals collision damage. Sometimes, this monster will spew a spell, which applies Nauseated on impact.
Fighting Tip: Putrid Ghosts are terrifying combat saboteurs because of the Nauseated debuff it fires at you. Assuming that one of them is nearby, prioritize killing them first. Make sure to hit them consistently. If they go near without your initiative, strike and reposition when necessary.
You may initiate them as they’re knocked back after attacking. Rinse and repeat.
Once a Putrid Ghost starts chasing you, run and make a sharp turn. This method will prevent you from taking the debuff, which prevents you from eating. If you caught the debuff, eat Ginger or drink Ginger Ale to negate the effect. You must wait two minutes if you have neither of those two items.
It’s noteworthy that the Crusader enchantment deals 50% more damage to Ghosts. We recommend Galaxy-forged weapons (except the Dagger) to use.
Golems
Golems are monsters found in the Mines or the Farm. They move slowly towards you to deal collision damage.
Fighting Tip: Golems are incredibly vulnerable to attack and don’t make any special moves. Swing your weapon against them. Easy as that.
Stone Golem

| Kill EXP | Damage | Health | Armor | Speed | Loot Materials | |
| 5 | 5 | 45 | 5 | 2 | Diamond (0.05%) Prismatic Shard (0.05%) Dwarf Scroll IV (0.1%) Dwarf Scroll I (0.5%) Coal (10%) Iron Ore (10%) Quartz (10%) Stone (90%) | |
| Dangerous Variant | 5 | 13 | 283 | 28 | 2 | Same items |
Regular and Dangerous Stone Golems appear on the 31 to 39 floors of the Mines.
Wilderness Golem

This Golem type will appear outside the Farmhouse at night upon choosing the Wilderness Farm. You may also encounter them by depositing a Strange Bun in the Dark Shrine of Night Terrors (Witch’s Hut). Alternatively, you can spawn them on the Farm when creating a new save file (Options).
As your combat level and expertise increase, so do the Wilderness Golem’s stats.
Haunted Skull
| Kill EXP | Damage | Health | Armor | Speed | Loot Materials | |
| 15 | 15 | 160 | 1 | 3 | Diamond (0.05%) Prismatic Shard (0.05%) Magic Rock Candy (0.13%) Dark Bandana Shirt (0.22%) Dark Highlight Shirt (0.22%) Gray Baggy Pants (0.22%) Gray Relaxed Fit Pants (0.22%) Skeleton Shirt (0.22%) Skull Shirt (0.22%) Aquamarine Ring (1.3%) Artifact Trove (1.3% upon completing Vault Bundles) Dark Sword (1.3%) Earth Crystal (1.3%) Mega Bomb (1.3%) Oak Resin (1.3%) Omni Geode (1.3%) Prehistoric Skull (1.3%) Ruby Ring (1.3%) Skeletal Hand (1.3%) Solar Essence (1.3%) Void Essence (1.3%) Rice Shoot (21.43% on Winter) | |
| Dangerous Variant | 15 | 19 to 26 | 310 | 2 | 3 | Added Drops: Dwarf Scroll IV (0.1%) Rare Disc (0.1%) Dwarf Scroll III (0.5%) Bomb (2%) Removed Drops: Dark Sword, Earth Crystal, Magic Rock Candy, Oak Resin, Prehistoric Skull, Skeletal Hand, Solar Essence, Void Essence, Gray Baggy Pants, Dark Bandana Shirt, Dark Highlight Shirt, Gray Relaxed Fit Pants, Skeleton Shirt, Skull Shirt, Rice Shoot, and Omni Geode |
Although more commonly found in the Quarry Mines, the Haunted Skull also appears on the dungeon Mines level. This monster has the same behavior as Bats and Serpents but moves faster than its other counterparts. Note: Haunted Skulls (Dangerous) also appear on floors 71 to 79 of the Dangerous Mines.
Haunted Skulls may appear already (passive) on the floor upon entering or will make a sound before approaching you.
Fighting Tip: They’re easy to fight with a Sword. If a Haunted Skull is closing the distance and you fail to hit, use Block. Otherwise, move around where it won’t hit you and strike again.
Lava Lurk

| Kill EXP | Damage | Health | Armor | Speed | Loot Materials |
| 12 | 15 | 220 | 5 | 2 | Diamond (0.05%) Prismatic Shard (0.05%) Dragon Tooth (15%) Bone Fragment (20% to 50%) |
The Volcano Dungeon in Stardew Valley is mainly filled with Lava where Lava Lurks like hiding and attacking when unobserved. As it ascends from the molten liquid, a Lava Lurk spits four fireballs toward you, dealing damage. The monster may also deal contact damage if you’re nearby.
Fighting Tip: Wait for the Lava Lurk’s head to pop, then strike it with your weapon choice. Hitting the monster while swimming will deal zero damage. Although the monster’s fireballs deal significant damage, you can destroy it.
The loot(s) will go to your inventory after slaying a Lava Lurk. If there’s no space, it’ll be gone forever.
Magma Sparker

| Kill EXP | Damage | Health | Armor | Speed | Loot Materials |
| 17 | 15 | 310 | 8 | 2 | Diamond (0.05%) Prismatic Shard (0.05%) Cinder Shard (20% to 50%) |
On floors five and above, you’ll find Magma Sparkers – the stronger version of Magma Sprites. They also fly above walls and dark space, charging towards you aggressively.
Once a Magma Sparker comes into contact, you may get Burnt (-3 ATK, -3 DEF, -2 SPD). The debuff is one of the most annoying in Stardew Valley despite taking six seconds before dissipating.
Occasionally, a Magma Sparker will charge at you like a Slime.
Fighting Tip: Once you see a Magma Sparker, kill it first. The Burnt debuff must be avoided as it makes you weaker. We recommend wearing Boots that boost your Defense and Immunity.
For the weapon choice, use Swords because of their AoE reliability. You may encounter more Magma Sprites or even Sparkers on higher Volcano Dungeon levels. Time your Sword’s special ability to prevent taking damage or debuff. Alternatively, you may want to keep moving to dodge their charging attack.
Magma Sprite
| Kill EXP | Damage | Health | Armor | Speed | Loot Materials |
| 2 | 6 | 40 | 2 | 3 | Diamond (0.05%) Prismatic Shard (0.05%) Dwarf Scroll IV (0.1%) Gold Bar (0.1%) Dwarf Scroll II (0.5%) Coffee Bean (1%) Crystal Fruit (2%) Frozen Tear (2%) Coal (50%) |
A Magma Sprite behaves similarly to Bats and Serpents. They can fly above walls and dark spaces and deal contact damage.
Fighting Tip: Magma Sprites are pretty tanky and deal significant damage. We recommend using Swords for the Block ability and AoE damage. You may also use any Hammer (preferably the Infinity Gavel) while repositioning yourself to a safer spot. Rinse and repeat.
Metal Heads
This monster family has three different variants:
- Metal Head
- Metal Head (Dangerous)
- Hot Head
All three types share a common behavior.
Metal Head

| Kill EXP | Damage | Health | Armor | Speed | Loot Materials | |
| 6 | 15 | 40 | 8 | 2 | Diamond (0.05%) Prismatic Shard (0.05%) Dwarf Scroll IV (0.1%) Dwarf Scroll III (0.5%) Coal (10%) Copper Ore (10%) Iron Ore (10%) Solar Essence (65%) Squire’s Helmet | |
| Dangerous Variant | 6 | 19 to 26 | 280 | 24 | 2 | Same drop |
In Stardew Valley, there’s little to almost nothing like walking tanks – except Metal Heads. Combining their high HP and damage resistance makes them harder to destroy.
Fighting Tip: Although Metal Heads have no special attacks, we recommend hitting them with a Hammer or Sword while moving. As they’re knockback-resistant, watch out for other enemies like Shadow Brutes and Shadow Shamans. Overall, Metal Heads must be the lowest priority of monsters to slay on floors 80 to 119. The Dangerous counterpart starts appearing on the 81st floor.
Hot Head

| Kill EXP | Damage | Health | Armor | Speed | Loot Materials |
| 16 | 18 | 215 | 8 | 2 (<25 = 5) | Dwarf Scroll IV (0.1%) Diamond (0.05%) Dwarf Scroll III (0.05%) Prismatic Shard (0.05%) Bomb (10%) Coal (10%) Copper Ore (10%) Iron Ore (10%) Pineapple Seeds (10%) Solar Essence (65%) Squire’s Helmet |
Like Metal Heads, Hot Heads share similar behavior. With high HP and defense, killing them may take a while. They also explode, destroying rocks and items while also damaging you if you’re in the 2-tile vicinity. However, this phase happens if the Hot Head’s health drops below 25.
Fighting Tip: Since Hot Heads behave like Metal Heads, we recommend swinging while moving to avoid collision damage. When they start chasing you once their health drops below 25, strategically reposition yourself near rocks. They’re a good alternative if you don’t have any bombs in your inventory. Note that you have 2.4 seconds to react, or you’ll take damage.
Mummy

| Kill EXP | Damage | Health | Armor | Speed | Loot Materials | |
| 20 | 30 | 260 | 0 | 2 | Diamond (0.05%) Prismatic Shard (0.05% to 1%) Dwarf Scroll IV (0.1%) Red Cabbage Seeds (0.2%) Curiosity Lure (1%) Miner’s Treat (4%) Cloth (5% to 20%) Solar Essence (15% to 99%) | |
| Dangerous Variant | 20 | 38 to 55 | 445 | 0 | 2 | Same drops |
Sometimes, you’ll encounter Egyptian-looking floors with narrow spaces at the Skull Cavern. Mummies are one of the place’s inhabitants, although other monsters may appear but not as dominant as the former.
Mummies move slowly toward you and attempt to deal contact damage. Once down, they’ll be immobilized for a while before reviving again.
Fighting Tip: Mummies are notorious for annoying behavior that can get overwhelming in high numbers. The best way to deal with this monster is by downing them and placing any Bomb type, dealing 999 damage. A Slingshot with Explosive Ammo will also do, but it’s an expensive option.
For maximized efficiency, however, we recommend piling them up near rocks and blowing them up. It’s noteworthy that a downed Mummy won’t deal collision damage.
Unlocking the Crusader enchantment is the best option to save you explosives. Upon gaining Forge access, input your weapon choice and a Prismatic Shard, and you might get the perk by chance.
Pepper Rex

| Kill EXP | Damage | Health | Armor | Speed | Loot Materials |
| 7 | 15 | 300 | 5 | 2 | Diamond (0.05%) Prismatic Shard (0.05%) Dinosaur Egg (10%) Prehistoric Rib (30%) Prehistoric tibia (30%) Prehistoric Vertebra (30%) |
The Pepper Rex is one of many new additions of monsters in Stardew Valley. They appear on Prehistoric Floors but sometimes on other Skull Cavern levels.
A Prehistoric Floor is considered an Infested version of the Mines, as it’s necessary to defeat all enemies. Afterward, the ladder will appear. However, you must deal with fire-shooting Pepper Rex first before your escape route is revealed.
Fighting Tip: A Pepper Rex moves slowly and doesn’t deal contact damage. As they focus on one direction while attacking, use that time frame to your advantage. Preferably, any Dagger will do as it deals burst damage (even if it’s a single target). Dealing with all of them is a headache, after all.
However, don’t completely change your position last minute, as they can follow you, dealing damage (opposite to your intent). Wait for them to attack, and you do the same.
Rock Crabs
The Rock Crab family are monsters disguised in the Mines, Dangerous Mines, and Skull Cavern. There are five different variants:
- Rock Crab
- Rock Crab (Dangerous)
- Lava Crab
- Lava Crab (Dangerous)
- Iridium Crab
This monster family is camouflaged as Stone or Ore Nodes, making unsuspecting players susceptible to surprise attacks.
Fighting Tip: Rock Crabs can damage you, so it’s necessary to spot one, as every HP matters. With that said, the laziest yet most effective strategy is by placing any Bomb. After the explosion, if there’s a Lava Crab nearby, it’ll destroy its shell and reveal the creature.
Alternatively, you may use a Pickaxe to make them mobile again or eventually destroy the shell.
Notably, any Lava Crab variants with their shell intact will be aggressive and try to deal collision damage. However, without its shell, it’ll try to flee (still vulnerable to attacks).
Hitting any Rock Crab variant in its immobile state will produce a unique sound while absorbing your weapon’s damage. That’s also a decent method to know if the monster is nearby and trying to make a surprise attack.
Rock Crab

| Kill EXP | Damage | Health | Armor | Speed | Loot Materials | |
| 4 | 5 | 30 | 1 | 2 | Diamond (0.05%) Prismatic Shard (0.05%) Dwarf Scroll IV (0.1%) Dwarf Scroll I (0.5%) Crab (15%) Cherry Bomb (40%) | |
| Dangerous Variant | 4 | 13 | 272 | 2 | 2 | Same drop |
The Rock Crab is the first variant of the same monster family you’ll encounter on the first 29 floors. It resembles a Stone Node.
Lava Crab

| Kill EXP | Damage | Health | Armor | Speed | Loot Materials | |
| 12 | 15 | 120 | 3 | 3 | Diamond (0.05%) Prismatic Shard (0.05%) Dwarf Scroll IV (0.1%) Dwarf Scroll III (0.5%) Crab (25%) Bomb (40%) | |
| Dangerous Variant | 12 | 19 to 26 | 340 | 8 | 3 | Same loot |
Lava Crabs appear on the Mines (80-119 floors) while their Dangerous counterpart is on the 81st to 119th levels. The former resembles a red Stone Node, while the latter disguises itself as a Gold Ore Node.
Iridium Crab

| Kill EXP | Damage | Health | Armor | Speed | Loot Materials |
| 20 | 15 | 240 | 3 | 3 | Diamond (0.05%) Prismatic Shard (0.05%) Crab Cakes (50%) Iridium Ore (50%) |
Iridium Crabs disguise themselves as Iridium Nodes on floors 26 and above in Skull Cavern. Since many players have the natural urge to mine Iridium Ores, spotting them is easy.
Royal Serpent

| Kill EXP | Damage | Health | Armor | Speed | Loot Materials |
| 20 | 32 to 48 | 150 (50 per segment) | 0 | 2 | Diamond (0.05%) Prismatic Shard (0.05% to 1%) Red Cabbage Seeds (0.2%) Rabbit’s Foot (0.8%) Spicy Eel (6%) Bomb (15%) Void Essence (15% to 99%) |
The Royal Serpent is the most challenging enemy to deal with in Stardew Valley if you’re unprepared. They spawn in all Skull Cavern floors and have varying lengths. Its base health is 150 and adds 50 more per tail. Note that a Royal Serpent won’t have less than three tails but will not exceed over 18.
A Royal Serpent’s head or any tail part will damage you and is also vulnerable to your attacks.
Fighting Tip: If you can’t take the pressure from defeating Royal Serpents, we recommend using a Staircase. However, if you plan to kill them, bring lots of food and a Sword or Hammer. Keep moving around to dodge their movement. You may want to consume Crab Cakes as it gives extra movement speed and bonus Defense.
Equipping the Crabshell Ring or Thorns Ring can also give some extra protection or damage on your end.
Yoba Ring may also be an excellent pick for temporary invincibility. However, the Phoenix Ring is the best option as it revives you back to 50% health after being downed. We recommend combining them on the Forge using Cinder Shards for extra functionality.
Once a Royal Serpent is hit, it’ll try to reposition. When that happens, strike them again until they have no room to attack.
Be wary of swarm events. Once the mist appears, use a Staircase for an emergency. Also, use health and energy-restoring consumables or Oil of Garlic to reduce their spawn rate.
Serpent

| Kill EXP | Damage | Health | Armor | Speed | Loot Materials |
| 20 | 23 | 150 | 0 | 2 | Diamond (0.05%) Prismatic Shard (0.05% to 0.1%) Red Cabbage Seeds (0.2%) Rabbit’s Foot (0.8%) Spicy Eel (6%) Bomb (15%) Void Essence (15% to 99%) |
The Serpent is one of the hardest-to-deal monsters while venturing inside the Skull Cavern. Because of their movement speed and high spawn rate, anyone without a strong enough weapon can get overwhelmed. They’re also pretty common, making them a nuisance while dealing against other monsters like Iridium Crabs and Purple Slimes.
Fighting Tip: Once you’re in the vicinity of a Serpent’s hostile zone (entered a new level), it’ll start attacking. We recommend staying on full alert and selecting your weapon. In this journey, use Swords or Hammers. Daggers may deal burst damage, but it’s not preferable for beginners or against Swarms.
If you see a Serpent approaching, strike it. Use your Sword’s special move to block their advances. Alternatively, a Hammer’s AoE slam might finish off those monsters if correctly timed.
Skeleton

| Kill EXP | Damage | Health | Armor | Speed | Loot Materials | |
| 8 | 10 | 140 | 1 | 2 | Diamond (0.05%) Prismatic Shard (0.05%) Prehistoric Scapula (0.5%) Bone Sword (4%) Bone Fragment (20% to 50%) | |
| Dangerous Variant | 8 | 16 to 18 | 655 | 2 | 2 | Same loot |
Skeletons appear exclusively on the Mines’ Icy levels (71 to 79). They mainly deal collision damage but will also throw high-damaging bones. It’s noteworthy that bone projectiles can pass through rock.
Fighting Tip: If you see a Skeleton nearby, greet them with a Sword. Keep attacking them, and don’t give them a chance to perform their special attack. If you failed to prevent their long-range attack, dodge the bone or destroy it with your weapon.
Skeleton Mage

| Kill EXP | Damage | Health | Armor | Speed | Loot Materials |
| 8 | 20 to 25 | 355 | 2 | 2 | Diamond (0.05%) Prismatic Shard (0.05%) Prehistoric Scapula (0.5%) Bone Sword (4%) Bone Fragment (20% to 50%) |
Reaching floors 71 to 79 may surprise you with Skeleton Mages. These monsters in Stardew Valley are comparable to Shadow Shamans as they cast spells.
Aside from contact damage, a Skeleton Mage will fire a projectile toward you (travels in a straight line). They’ll also try freezing you with their debuff.
Fighting Tip: Keep your distance from the Skeleton Mage. It’ll raise its hands if it’s about to cast the Frozen debuff. When you see the animation, prepare to dodge! Keep moving and hitting them until they’re defeated. Sometimes, dodging the debuff projectile is impossible. When that happens, try to swing your weapon to approaching enemies.
Slimes
The Slime family is the most common monster in Stardew Valley. They appear in the Mines, Dangerous Mines, Quarry Mines, Skull Cavern, and Volcano Dungeon. You may even encounter them on the Ginger Island Farm or raise them at the Slime Hutch.
Despite their cutesy nature, Slimes can harm you. They’ll attempt dealing contact damage, sometimes applying the Slimed debuff (movement speed reduction). Alternatively, they may jump toward your position or chase you when angry.
Aside from regular Slimes, there are more types:
- Big Slimes
- Dangerous Slimes
- Special Slimes
- Prismatic Slimes
General Fighting Tip: The best weapon to deal with against any Slime is a Sword or Hammer because of AoE. While Daggers can work, it’s noteworthy how many can appear on one floor. Keep swinging until they’ve vanished. Rinse and repeat.
You’ll see an animation if a Slime is about to charge toward your position. Cancel it by hitting the monster or dodge it quickly!
Each collision damage has a chance to inflict the Slimed debuff, which reduces your movement speed. With that in mind, drink Coffee to recover or wear Footwear that increases your Immunity. You can always Block with your Sword to increase your survival chance.
For the best protection against Slimes, the Slime Charmer Ring works best. It’ll negate any damage or debuff despite contact, reducing the headaches of every combat. However, you must slay 1000 Slimes first before collecting the Ring from Gil at the Adventurer’s Guild.
Green Slime

| Kill EXP | Damage | Health | Armor | Speed | Loot Materials | |
| 3 | 5 | 24 | 1 | 2 | Dwarf Scroll IV (0.1%) Dwarf Scroll I (0.5%) Green Slime Egg (1% if the Slime Hutch is built) Amethyst (1.5%) Slime (5% to 75%) Green Algae (10%) Mahogany Seed (10% in Secret Woods) Sap (15%) | |
| Special Variant | 3 | 10 | 72 | 1 | 2 | Same drop + special items |
Green Slimes are found on the first 29 floors of the Mines. They’re the easiest to kill of all monsters in Stardew Valley.
A Green Slime’s Special counterpart has a 0.175% chance of appearing on floors one to 40.
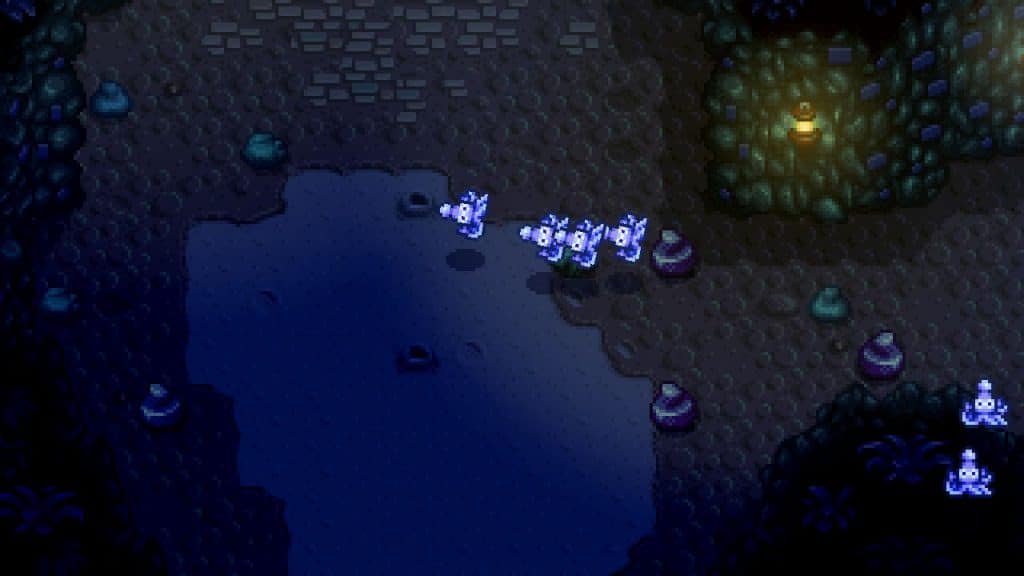
Frost Jelly

| Kill EXP | Damage | Health | Armor | Speed | Loot Materials | |
| 6 | 7 | 106 | 0 | 2 | Dwarf Scroll IV (0.1%) Dwarf Scroll II (0.5%) Blue Slime Egg (1% after building the Slime Hutch) Dwarf Scroll III (1.5%) Jade (2%) Winter Root (8%) Mahogany Seed (10% in Secret Woods) Sap (50%) Slime (75%) | |
| Special Variant | 6 | 14 | 318 | 0 | 2 | Same drop + special items |
Frost Jellies are blue-colored Slimes that appear on floors 41 to 79. They’re stronger than their Green counterpart but weaker than Red and Purple Sludge. They gain +2 Speed when glowing.
There’s a 0.175% chance that a Special Frost Jelly will appear on floors 40 to 80.
Red Sludge

| Kill EXP | Damage | Health | Armor | Speed | Loot Materials | |
| 10 | 16 | 205 | 0 | 2 | Dwarf Scroll IV (0.1%) Dwarf Scroll III (0.5%) Diamond (1%) Red Slime Egg (1% after building the Slime Hutch) Coal (10%) White Algae (10%) Sap (50%) Slime (80%) | |
| Special Variant | 10 | 32 | 615 | 0 | 2 | Regular drops and special items |
Red Sludge is a type of Slime found on floors 81 to 119 in the Mines. They’re stronger than their regular and Frost counterparts but weaker than the Purple one.
Between floors 80 to 120 of the Mines, there’s a 0.175% chance that a Special Red Sludge will appear.
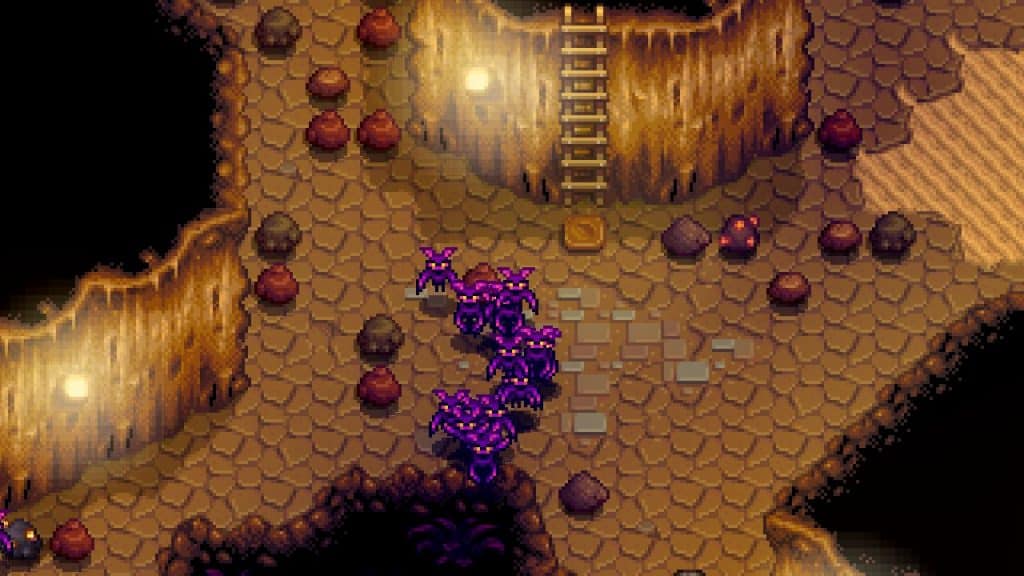
Purple Slime

| Kill EXP | Damage | Health | Armor | Speed | Loot Materials | |
| 10 | 16 | 410 | 0 | 2 | Dwarf Scroll IV (0.1%) Red Cabbage Seeds (0.125%) Dwarf Scroll III (0.5%) Iridium Bar (0.9%) Diamond (1%) Purple Slime Egg (1% after building a Slime Hutch) Iridium Ore (8%) Coal (10%) White Algae (10%) Sap (50%) Slime (80%) | |
| Special Variant | 10 | 32 | 1230 | 0 | 2 | Regular drops and special items |
The Purple Slime is the strongest non-dangerous variant of the Slime family that appears exclusively at the Skull Cavern.
There’s a 0.175% chance for a Special Purple Slime to appear in the Skull Cavern.
Dark Green Slime

| Kill EXP | Damage | Health | Armor | Speed | Loot Materials | |
| Depends on the original Slime’s kill XP | Original Slime’s damage (2x multiplier) | Original Slime’s health (3x multiplier) | Depends on the original Slime’s armor | 2 | Depends on the Original Slime’s drops. | |
| Special Variant | 3 | 10 | 72 | 1 | 2 | Same loot and some special items |
Little is known about Dark Green Slimes, except they’re guaranteed a 0.1% chance to be an outcome from breeding. However, the Special variant has better odds of appearing (1%) in the Mines. Specifically, you might encounter them on levels two to 39, except on floors ending in 0, 1, 5, and 6.
Black Slime

| Kill EXP | Damage | Health | Armor | Speed | Loot Materials | |
| Depends on the Original Slime’s kill XP | Depends on the Original Slime’s damage | Depends on the Original Slime’s health | Depends on the Original Slime’s armor | 2 | Depends on the Original Slime’s drop | |
| Special Variant | Depends on the Original Slime’s kill XP | Depends on the Original Slime’s damage | Depends on the Original Slime’s health | Depends on the Original Slime’s armor | 2 | Blue Slime Egg (1% if a Slime Hutch is present) Regular drops + Special items (floors 42 to 59, 69, and 79). |
The Black Slime exclusively appears once a Witch flies over the Slime Hutch. After the event, you’ll see the monster retaining its original properties.
Meanwhile, Special Black Slimes exclusively appear on floors 42 to 79 (1% chance). However, you won’t encounter them on levels ending in 0, 1, 5, and 6.
Note: The Wicked Statue prevents the Witch from turning your regular Slimes into Black Slimes.
Copper Slime
| Kill EXP | Damage | Health | Armor | Speed | Loot Materials | |
| 10 | 16 | 102 | 0 | 4 | Dwarf Scroll IV (0.1%) Dwarf Scroll III (0.5%) Diamond (1%) White Algae (10%) Copper Ore (33%) Sap (50%) Slime (80%) | |
| Special Variant | 10 | 32 | 306 | 0 | 4 | Regular drops + special items |
Copper Slimes are exclusively available on random Dungeon Floors in the Mines and the Quarry Mine. They possess the highest movement speed. Its Special counterpart has a 0.175% chance of appearing.
Iron Slime

| Kill EXP | Damage | Health | Armor | Speed | Loot Materials | |
| 10 | 16 | 205 | 0 | 1 | Dwarf Scroll IV (0.1%) Dwarf Scroll III (0.5%) Diamond (1%) White Algae (10%) Iron Ore (33%) Sap (50%) Slime (80%) | |
| Special Variant | 10 | 32 | 615 | 0 | 1 | Regular drops + Special items |
On some Dungeon Floors in the Mines, you might encounter Iron Slimes. They’re also common in the Quarry Mine alongside their Copper counterpart. A Special Iron Slime has a 0.175% chance of appearing.
Tiger Slime

| Kill EXP | Damage | Health | Armor | Speed | Loot Materials |
| 20 | 23 | 415 | 0 | 2 | Dwarf Scroll IV (0.1%) Tiger Hat (0.1%) Dwarf Scroll III (0.5%) Mango Sapling (0.5%) Diamond (1%) Tiger Slime Egg (1% after building the Slime Hutch) Pineapple Seeds (1.6%) Jade (2%) Ginger (9%) Taro Tuber (10% first time, 50% next time) White Algae (10%) Sap (50%) Slime (80%) |
The Tiger Slime is one of the newest inclusions to the Slime family in Stardew Valley. You’ll find them in the Volcano Dungeon and the Tiger Grove, minding their business. The Tiger Grove is located between the Island Farm and Qi’s Walnut Room.
Aside from better stats than its weaker counterparts, the Tiger Slime behaves similarly to them. Moreover, they drop better loot (usually Ginger Island-exclusive such as Taro Tuber, Ginger, and Pineapple Seeds).
Dangerous Slimes

After collecting 100 Golden Walnuts and accessing Qi’s Walnut Room, you may finish some of Qi’s Special Orders. Quests like “Danger in the Deep” and “Skull Cavern” activate Dangerous Slimes – a stronger variant in the monster family. Finishing the former enables you to reactivate the Dangerous Mines with the Shrine of Challenge.
They usually have a 2x health and damage multiplier and appear in groups. Occasionally, Dangerous Slimes may stack on top of each other, but they’re still vulnerable to damage.
Fighting Tip: Dangerous Slimes are harder to kill and deal more damage. We recommend enchanting your gear at the Forge, depending on your liking. You may also opt for special augments with Prismatic Shards and some Cinder Shards. After all, more damage equates to faster combat and a higher survival rate.
Since the Slime Charmer Ring won’t work, it’s best to use more useful Rings like Phoenix and Yoba combined.
Big Slimes

| Kill EXP | Damage | Health | Armor | Speed | |
| Green | 7 | 6 | 60 | 0 | 2 |
| Blue | 14 | 5 | 120 | 0 | 2 |
| Red | 21 | 10 | 180 | 0 | 2 |
| Purple | 21 | 15 | 240 | 0 | 2 |
Drops:
- Dwarf Scroll IV (0.1%)
- Galaxy Soul (0.45% during “Skull Cavern Invasion”)
- Pink Cake (0.1% starting at Floor 40 in the Mines and any floor in Skull Cavern)
- Qi Gem (10% during “Skull Cavern Invasion”)
- Slime (40% to 99%)
Most Big Slimes (purple ones) appear in the Skull Cavern, making a sound to alert you of their presence. Although they’re also present in the Mines (non-purple), encountering them is extremely rare.
Fighting Tip: Killing Big Slimes is easy because of their low mobility. However, there’s a 75% chance of splitting into two to four smaller, hostile slimes. When that happens, apply our general tips for fighting them and stay alive.
Prismatic Slime
Throughout your Stardew Valley gameplay, you’ll encounter one Prismatic Slime and never again after that. It’s because this special monster is available only during “Prismatic Jelly” – one of Wizard’s Special Orders.
A Prismatic Slime has 35 Damage and 1000 Health. Moreover, there’s a 1.2% chance it’ll spawn in the Mines, Dangerous Mines, Quarry Mines, or Skull Cavern. You may increase your odds of finding the monster with Luck.
Spider

| Kill EXP | Damage | Health | Armor | Speed | Loot Materials |
| 15 | 15 | 200 | 2 | 3 | Diamond (0.05%) Prismatic Shard (0.05%) Dwarf Scroll IV (0.1%) Iridium Bar (0.2%) Rare Disc (0.3%) Dwarf Scroll III (0.5%) Gold Bar (1%) Iron Bar (2%) Copper Bar (4%) Strange Bun (4%) Coal (10%) Void Essence (10% to 75%) |
It’s common to encounter Spiders on floors 51 to 69 in the Mines. As they spawn in groups, dealing with them might overwhelm you.
Spiders can jump through any debris and will try to deal contact damage. While jumping, dealing damage and knocking them back is impossible.
Fighting Tip: If you can’t handle Spiders, use a Staircase to descend one level. Alternatively, use a Hammer and its special move to deal AoE damage since they spawn in swarms. It’s a top priority to kill them before a Putrid Ghost appears.
Stick Bug

| Kill EXP | Damage | Health | Armor | Speed | Loot Materials |
| 4 | 20 | 700 | 2 | 3 | Diamond (0.05%) Prismatic Shard (0.05%) Qi Gem (50% to 100%) Ginger (100%) |
Stick Bugs start appearing on floors 41 to 69 and will mimic a piece of Wood. They’re comparable to Rock Crabs but with higher HP.
Fighting Tip: Stick Bugs are extremely tanky. We recommend ignoring them or using Bombs to kill them.
Squid Kid

| Kill EXP | Damage | Health | Armor | Speed | Loot Materials | |
| 15 | 18 | 1 | 2 | 3 | Diamond (0.05%) Prismatic Shard (0.05%) Dwarf Scroll IV (0.1%) Dwarf Scroll III (0.5%) Gold Bar (5%) Mega Bomb (5%) Bomb (10%) Squid Ink (20%) Solar Essence (75%) | |
| Dangerous Variant | 15 | 22 to 32 | 250 | 6 | 3 | Same drop |
The Squid Kid is a monster from levels 81 to 119 of the Mines. It shoots a fireball that can ricochet off walls, so you’ll have to move a lot to dodge! Although they’re highly vulnerable, the Squid Kid’s dangerous variant shoots four fireballs, making dodging harder.
Fighting Tip: Since a normal Squid Kid shoots one fireball, carefully approach the monster and kill it. It has one HP, making it susceptible even to a Scythe attack. However, we recommend using a Slingshot to defeat the more powerful variant found in the Dangerous Mines.
Void Spirits
Void Spirits are enemies that appear in the Mines starting from the 81st floor. They’re related to Krobus – a friendly NPC that resides in the Pelican Town Sewers.
Shadow Brute

| Kill EXP | Damage | Health | Armor | Speed | Loot Materials | |
| 15 | 18 | 160 | 2 | 3 | Diamond (0.05%) Prismatic Shard (0.05%) Dwarf Scroll IV (0.1%) Iridium Bar (0.2%) Rare Disc (0.3%) Dwarf Scroll III (0.5%) Gold Bar (1%) Iron Bar (2%) Copper Bar (4%) Strange Bun (4%) Coal (10%) Void Essence (10% to 75%) | |
| Dangerous Variant | 15 | 22 to 32 | 370 | 6 | 3 | Same loot |
In groups, Shadow Brutes are lethal because of their high knockback resistance. You’ll encounter them on floors 81 to 119 of the Mines.
Fighting Tip: Although a Shadow Brute has no special attacks, they’re still relatively challenging to defeat. One trick is to attack them as much as possible and back off when they get near.
Shadow Shaman

| Kill EXP | Damage | Health | Armor | Speed | Loot Materials | |
| 15 | 17 | 80 | 2 | 3 | Diamond (0.05%) Prismatic Shard (0.05%) Dwarf Scroll IV (0.1%) Iridium Bar (0.2%) Rare Disc (0.3%) Dwarf Scroll III (0.5%) Gold Bar (1%) Iron Bar (2%) Copper Bar (4%) Coal (10%) Void Essence (20% to 75%) | |
| Dangerous Variant | 15 | 21 to 30 | 310 | 6 | 3 | Same items |
Starting on the 81st to 119th floors is where Shadow Shamans start appearing in the Mines. Despite their low health, casters are generally annoying in Stardew Valley as they sabotage the combat.
Fighting Tip: A Shadow Shaman has two attacking phases, and here’s how to counter them:
1st phase: When alone, it’ll cast a spell that applies Jinx. The debuff will reduce your Defense by 8 (worse without any Footwear). When the Shadow Shaman is about to cast the spell, a ring of leaves will appear.
Wearing boots with an excellent Immunity buff lessens your chance of getting the Jinx debuff. You can also dodge the spell by looking at the Shadow Shaman when it’s about to cast. When hit by Jinx, consider retreating if the stakes of you getting overrun are high.
Note: It’ll try to AoE heal enemies nearby or deal collision damage.
2nd phase: At low health, the Shadow Shaman will flee from the scene and avoid attacking you. It’ll no longer heal enemies.
It’s best to attack the healer first to avoid unnecessary prolonged fights. After all, the Mines are susceptible to mists which will summon swarms of Lava Bats if you’re unlucky.
Shadow Sniper

| Kill EXP | Damage | Health | Armor | Speed | Loot Materials |
| 20 | 18 | 300 | 2 | 3 | Diamond (0.05%) Prismatic Shard (0.05%) Dwarf Scroll IV (0.1%) Iridium Bar (0.2%) Rare Disc (0.3%) Dwarf Scroll III (0.5%) Gold Bar (1%) Iron Bar (2%) Copper Bar (4%) Strange Bun (4%) Coal (10%) Void Essence (10% to 75%) |
Although intimidating, Shadow Snipers are vulnerable and easy to kill. They position at your current line of sight and will shoot you, inflicting Darkness. The debuff makes your screen almost black, making it hard to see enemies.
You’ll start encountering Shadow Snipers on floors 81 to 119 of the Mines.
Fighting Tip: Once a Shadow Sniper is about to shoot, you have ample time to dodge. However, make sure to stay away from them after a few swings. Although they only shoot at a straight line, not catching the debuff can be a game-changer.
Wilderness Farm Monsters
The following are exactly every monster that’ll spawn in your Stardew Valley Farm:
| Level 0-3 Combat | Level 4-7 Combat | Level 8-9 Combat | Level 10 Combat | All Combat Levels |
| Green Slime | Frost Bat | Frost Bat | Frost Bat | Bat |
| Frost Jelly | Lava Bat | Iridium Bat | Wilderness Golem | |
| Red Sludge | Lava Bat | |||
| Shadow Brute | Purple Slime | |||
| Serpent | ||||
| Shadow Brute |
To disable monsters from spawning in your Farm, you must complete the Community Center or Joja Warehouse first. Afterward, you need access to the Witch’s Hut and offer a Strange Bun to the Dark Shrine of Night Terrors.